Jeep Parts Wiki | Ford Parts Wiki
Home | Search | Browse | Marketplace | Messages | FAQ | Guest
Prev
 Next
Next
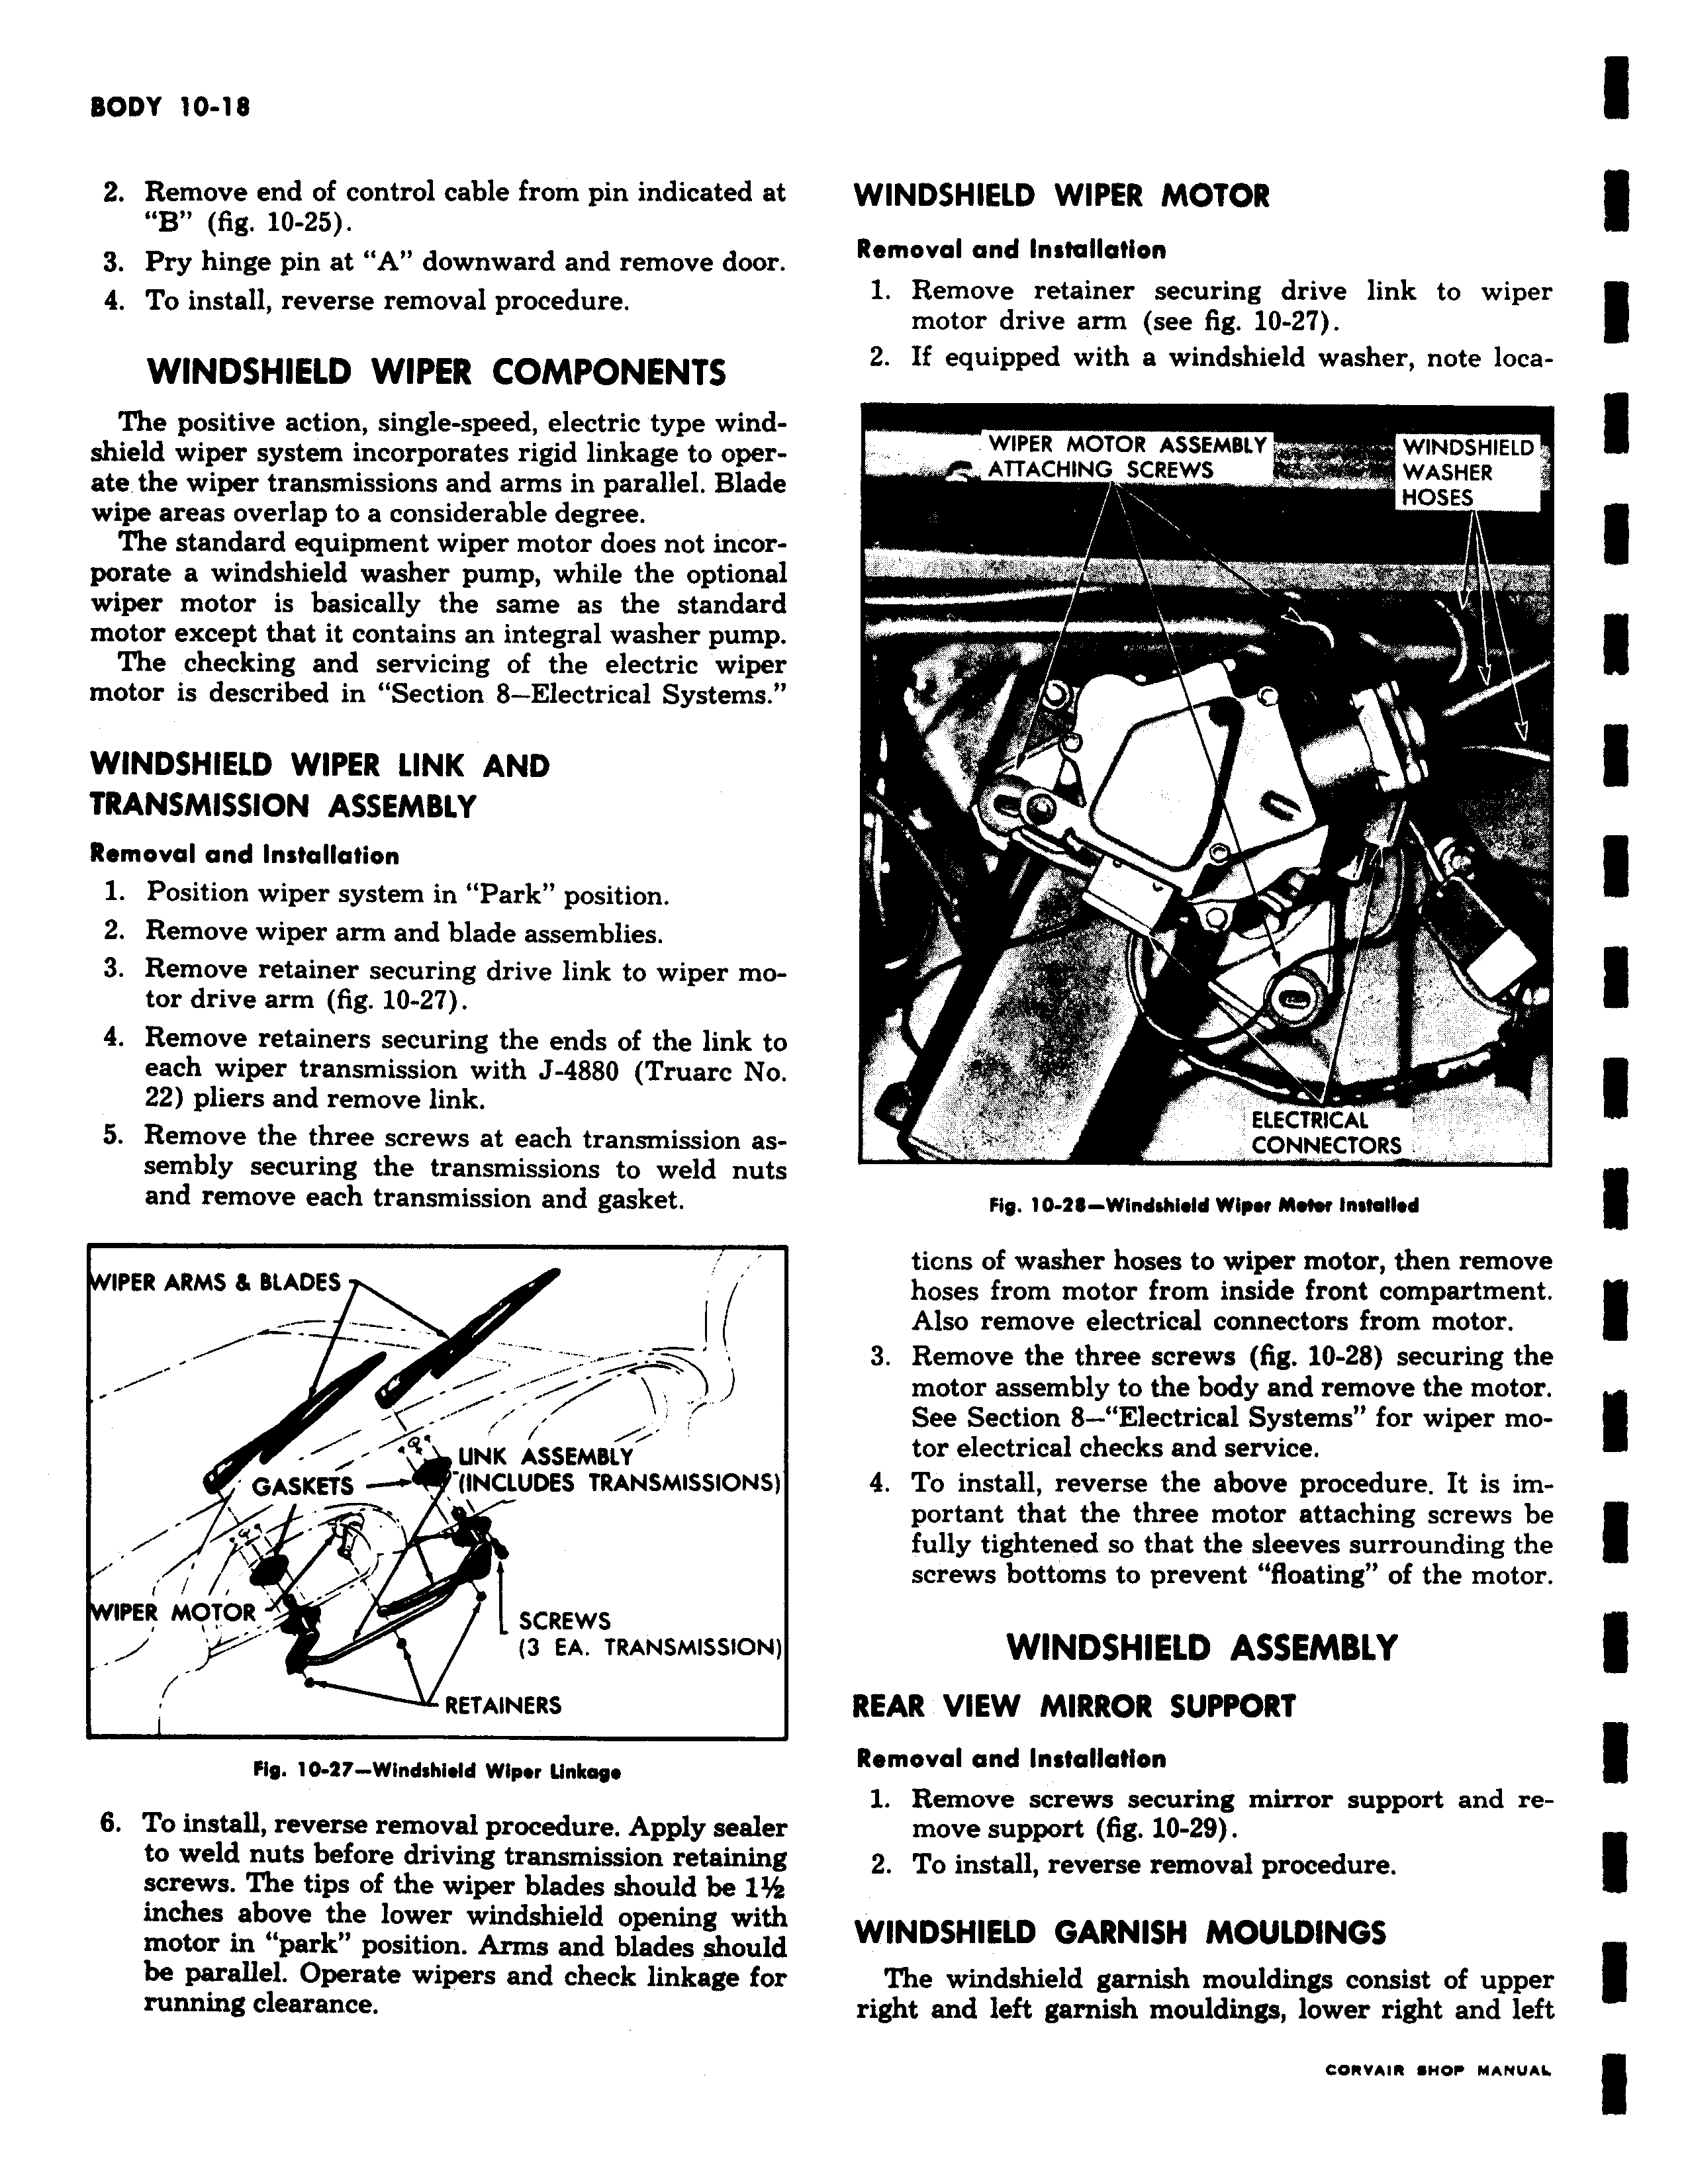
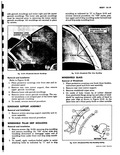
2 Remove end of control cable from pin indicated at B fig 10 25 3 Pry hinge pin at A downward and remove door 4 To install reverse removal procedure WINDSHIELD WIPER COMPONENTS The positive action single speed electric type windshield wiper system incorporates rigid linkage to operate the wiper transmissions and arms in parallel Blade wipe areas overlap to a considerable degree The standard equipment wiper motor does not incorporate a windshield washer pump while the optional wiper motor is basically the same as the standard motor except that it contains an integral washer pump The checking and servicing of the electric wiper motor is described in Section 8 Electrical Systems WINDSHIELD WIPER LINK AND TRANSMISSION ASSEMBLY Removal and Installation 1 Position wiper system in Park position 2 Remove wiper arm and blade assemblies 3 Remove retainer securing drive link to wiper motor drive arm fig 10 27 4 Remove retainers securing the ends of the link to each wiper transmission with J 4880 Truarc No 22 pliers and remove link 5 Remove the three screws at each transmission assembly securing the transmissions to weld nuts and remove each transmission and gasket WIPER ARMS BLADES UNK ASS EMBIY GASKETS INCLUDES TRANSMISSIONS WIPER MOTOR SCREWS 3 EA TRANSMISSION RETAINERS Fig 10 27 Windshidd Wiper Linkage 6 To install reverse removal procedure Apply sealer to weld nuts before driving transmission retaining screws The tips of the wiper blades should be l inches above the lower windshield opening with motor in park position Arms and blades should be parallel Operate wipers and check linkage for running clearance WINDSHIELD WIPER MOTOR Removal and Installation 1 Remove retainer securing drive link to wiper motor drive arm see fig 10 27 2 If equipped with a windshield washer note locaWIPER MOTOR ASSEMBLY WINDSHIELD w ATTACHING SCREWS WASHER HOSES v ELECTRICAL CONNECTORS Fig 10 28 Windshield Wiper MNer ImfalNd ticns of washer hoses to wiper motor then remove hoses from motor from inside front compartment Also remove electrical connectors from motor 3 Remove the three screws fig 10 28 securing the motor assembly to the body and remove the motor See Section 8 Electrical Systems for wiper motor electrical checks and service 4 To install reverse the above procedure It is important that the three motor attaching screws be fully tightened so that the sleeves surrounding the screws bottoms to prevent floating of the motor WINDSHIELD ASSEMBLY REAR VIEW MIRROR SUPPORT Removal and Installation 1 Remove screws securing mirror support and remove support fig 10 29 2 To install reverse removal procedure WINDSHIELD GARNISH MOULDINGS The windshield garnish mouldings consist of upper right and left garnish mouldings lower right and left