Jeep Parts Wiki | Ford Parts Wiki
Home | Search | Browse | Marketplace | Messages | FAQ | Guest
Prev
 Next
Next
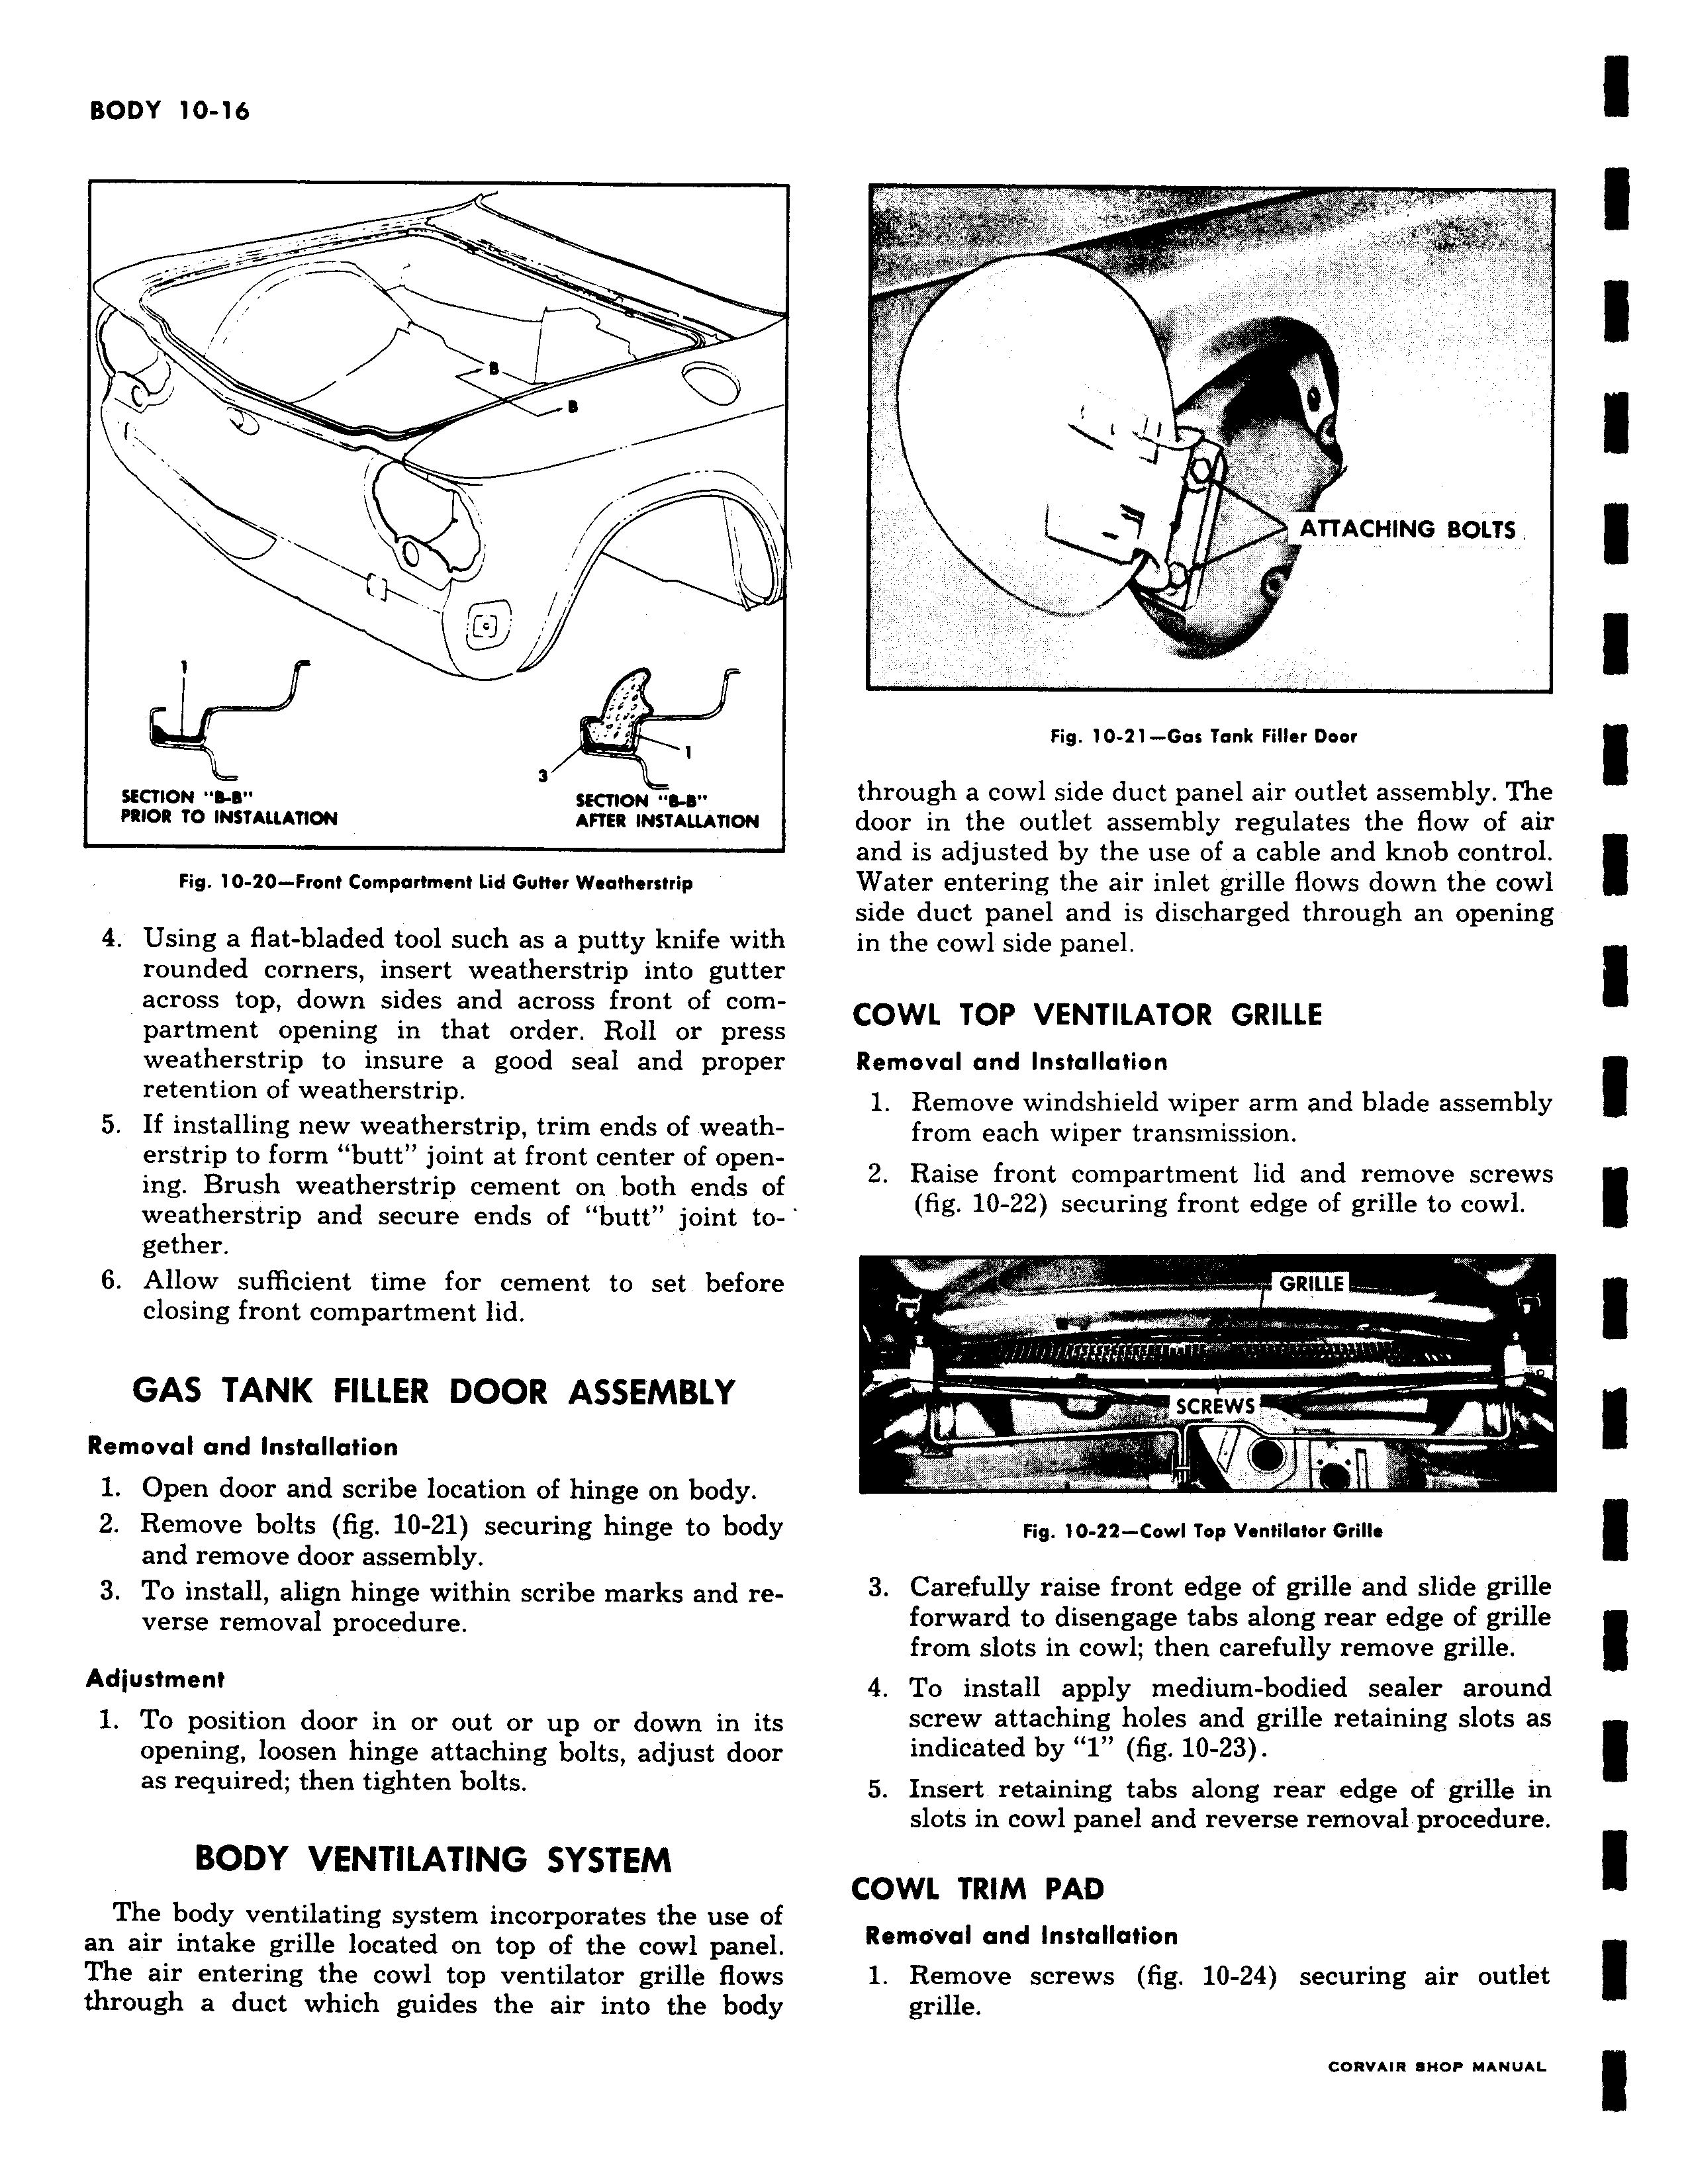
r 1 d t w l 1 1 9 SECTION s s SECTION PRIOR TO INSTALLATION AFTER INSTALLATION Fig 10 20 Front Compartment Lid Gutter Weatheratrip 4 Using a flat bladed tool such as a putty knife with rounded corners insert weatherstrip into gutter across top down sides and across front of com partment opening in that order Roll or press weatherstrip to insure a good seal and proper retention of weatherstrip 5 If installing new weatherstrip trim ends of weatherstrip to form butt joint at front center of opening Brush weatherstrip cement on both ends of weatherstrip and secure ends of butt joint to gether 6 Allow sufficient time for cement to set before closing front compartment lid GAS TANK FILLER DOOR ASSEMBLY Removal and Installation 1 Open door and scribe location of hinge on body 2 Remove bolts fig 10 21 securing hinge to body and remove door assembly 3 To install align hinge within scribe marks and reverse removal procedure Adjustment 1 To position door in or out or up or down in its opening loosen hinge attaching bolts adjust door as required then tighten bolts BODY VENTILATING SYSTEM The body ventilating system incorporates the use of an air intake grille located on top of the cowl panel The air entering the cowl top ventilator grille flows through a duct which guides the air into the body poN ATTACHING BOLTS ALT Fig 10 21 Gas Tank Filler Door through a cowl side duct panel air outlet assembly The door in the outlet assembly regulates the flow of air and is adjusted by the use of a cable and knob control Water entering the air inlet grille flows down the cowl side duct panel and is discharged through an opening in the cowl side panel COWL TOP VENTILATOR GRILLE Removal and Installation 1 Remove windshield wiper arm and blade assembly from each wiper transmission 2 Raise front compartment lid and remove screws fig 10 22 securing front edge of grille to cowl GRILLE SCREWS I M 11 Fig 10 22 Cowl Top Ventilator Grille 3 Carefully raise front edge of grille and slide grille forward to disengage tabs along rear edge of grille from slots in cowl then carefully remove grille 4 To install apply medium bodied sealer around screw attaching holes and grille retaining slots as indicated by 1 fig 10 23 5 Insert retaining tabs along rear edge of grille in slots in cowl panel and reverse removal procedure COWL TRIM PAD Removal and Installation 1 Remove screws fig 10 24 securing air outlet grille