Jeep Parts Wiki | Ford Parts Wiki
Home | Search | Browse | Marketplace | Messages | FAQ | Guest
Prev
 Next
Next
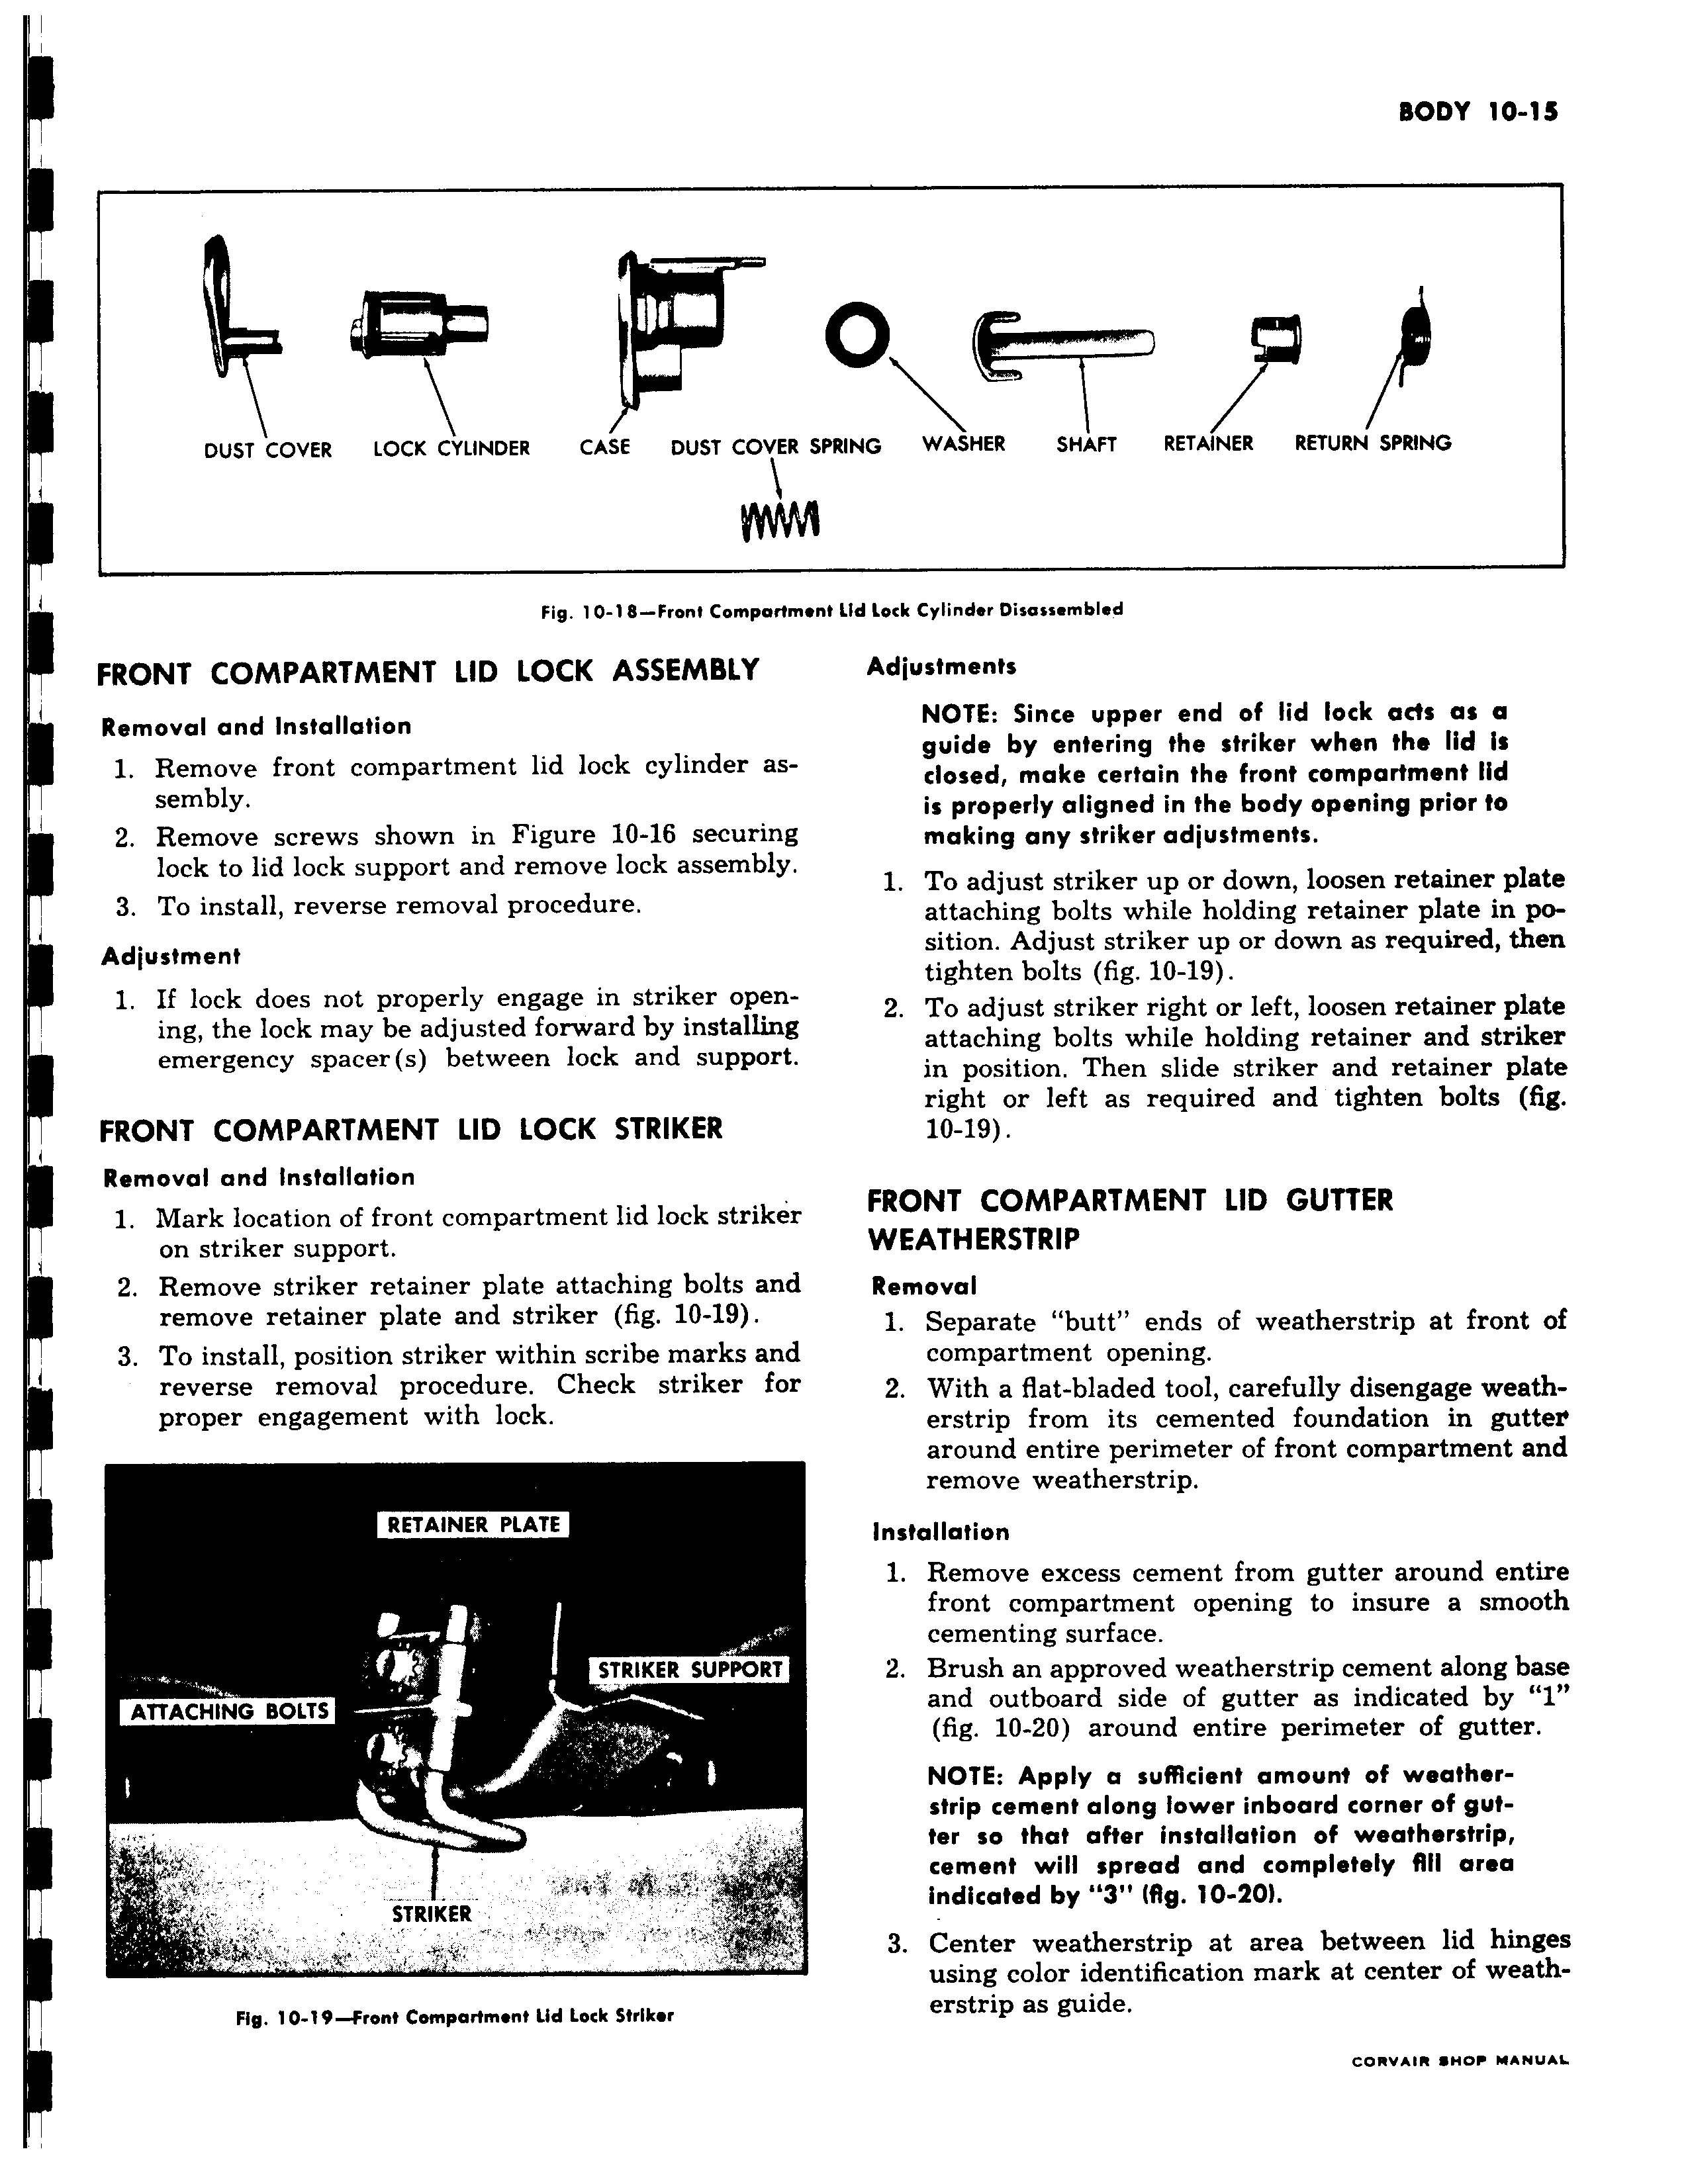
i v DUST COVER LOCK CYLINDER CASE DUST COVER Fig 10 18 Front Comportm FRONT COMPARTMENT LID LOCK ASSEMBLY r Removal and Installation 1 Remove front compartment lid lock cylinder assembly I 2 Remove screws shown in Figure 10 16 securing lock to lid lock support and remove lock assembly 3 To install reverse removal procedure Adjustment 1 If lock does not properly engage in striker opening the lock may be adjusted forward by installing emergency spacer s between lock and support FRONT COMPARTMENT LID LOCK STRIKER Removal and Installation 1 Mark location of front compartment lid lock striker on striker support 2 Remove striker retainer plate attaching bolts and remove retainer plate and striker fig 10 19 3 To install position striker within scribe marks and reverse removal procedure Check striker for I proper engagement with lock RETAINER PLATE STRIKER SUPPORT ATTACHING BOLTS STRIKER Fig 10 19 front Compartment Lid Lock Striker 0 7 r XzP SPRING WASHER SHAFT RETAINER RETURN SPRING Pnf Lid lock Cylinder Disassembled Adjustments NOTE Since upper end of lid lock ads as a guide by entering the striker when the lid is dosed make certain the front compartment lid is properly aligned in the body opening prior to making any striker adjustments 1 To adjust striker up or down loosen retainer plate attaching bolts while holding retainer plate in position Adjust striker up or down as required then tighten bolts fig 10 19 2 To adjust striker right or left loosen retainer plate attaching bolts while holding retainer and striker in position Then slide striker and retainer plate right or left as required and tighten bolts fig 10 19 FRONT COMPARTMENT LID GUTTER WEATHERSTRIP Removal 1 Separate butt ends of weatherstrip at front of compartment opening 2 With a flat bladed tool carefully disengage weatherstrip from its cemented foundation in gutter around entire perimeter of front compartment and remove weatherstrip Installation 1 Remove excess cement from gutter around entire front compartment opening to insure a smooth cementing surface 2 Brush an approved weatherstrip cement along base and outboard side of gutter as indicated by 1 fig 10 20 around entire perimeter of gutter NOTE Apply a sufficient amount of weatherstrip cement along lower inboard corner of gut ter so that after installation of weatherstrip cement will spread and completely fill area indicated by 3 fig 10 20 3 Center weatherstrip at area between lid hinges using color identification mark at center of weatherstrip as guide