Jeep Parts Wiki | Ford Parts Wiki
Home | Search | Browse | Marketplace | Messages | FAQ | Guest
Prev

 Next
Next
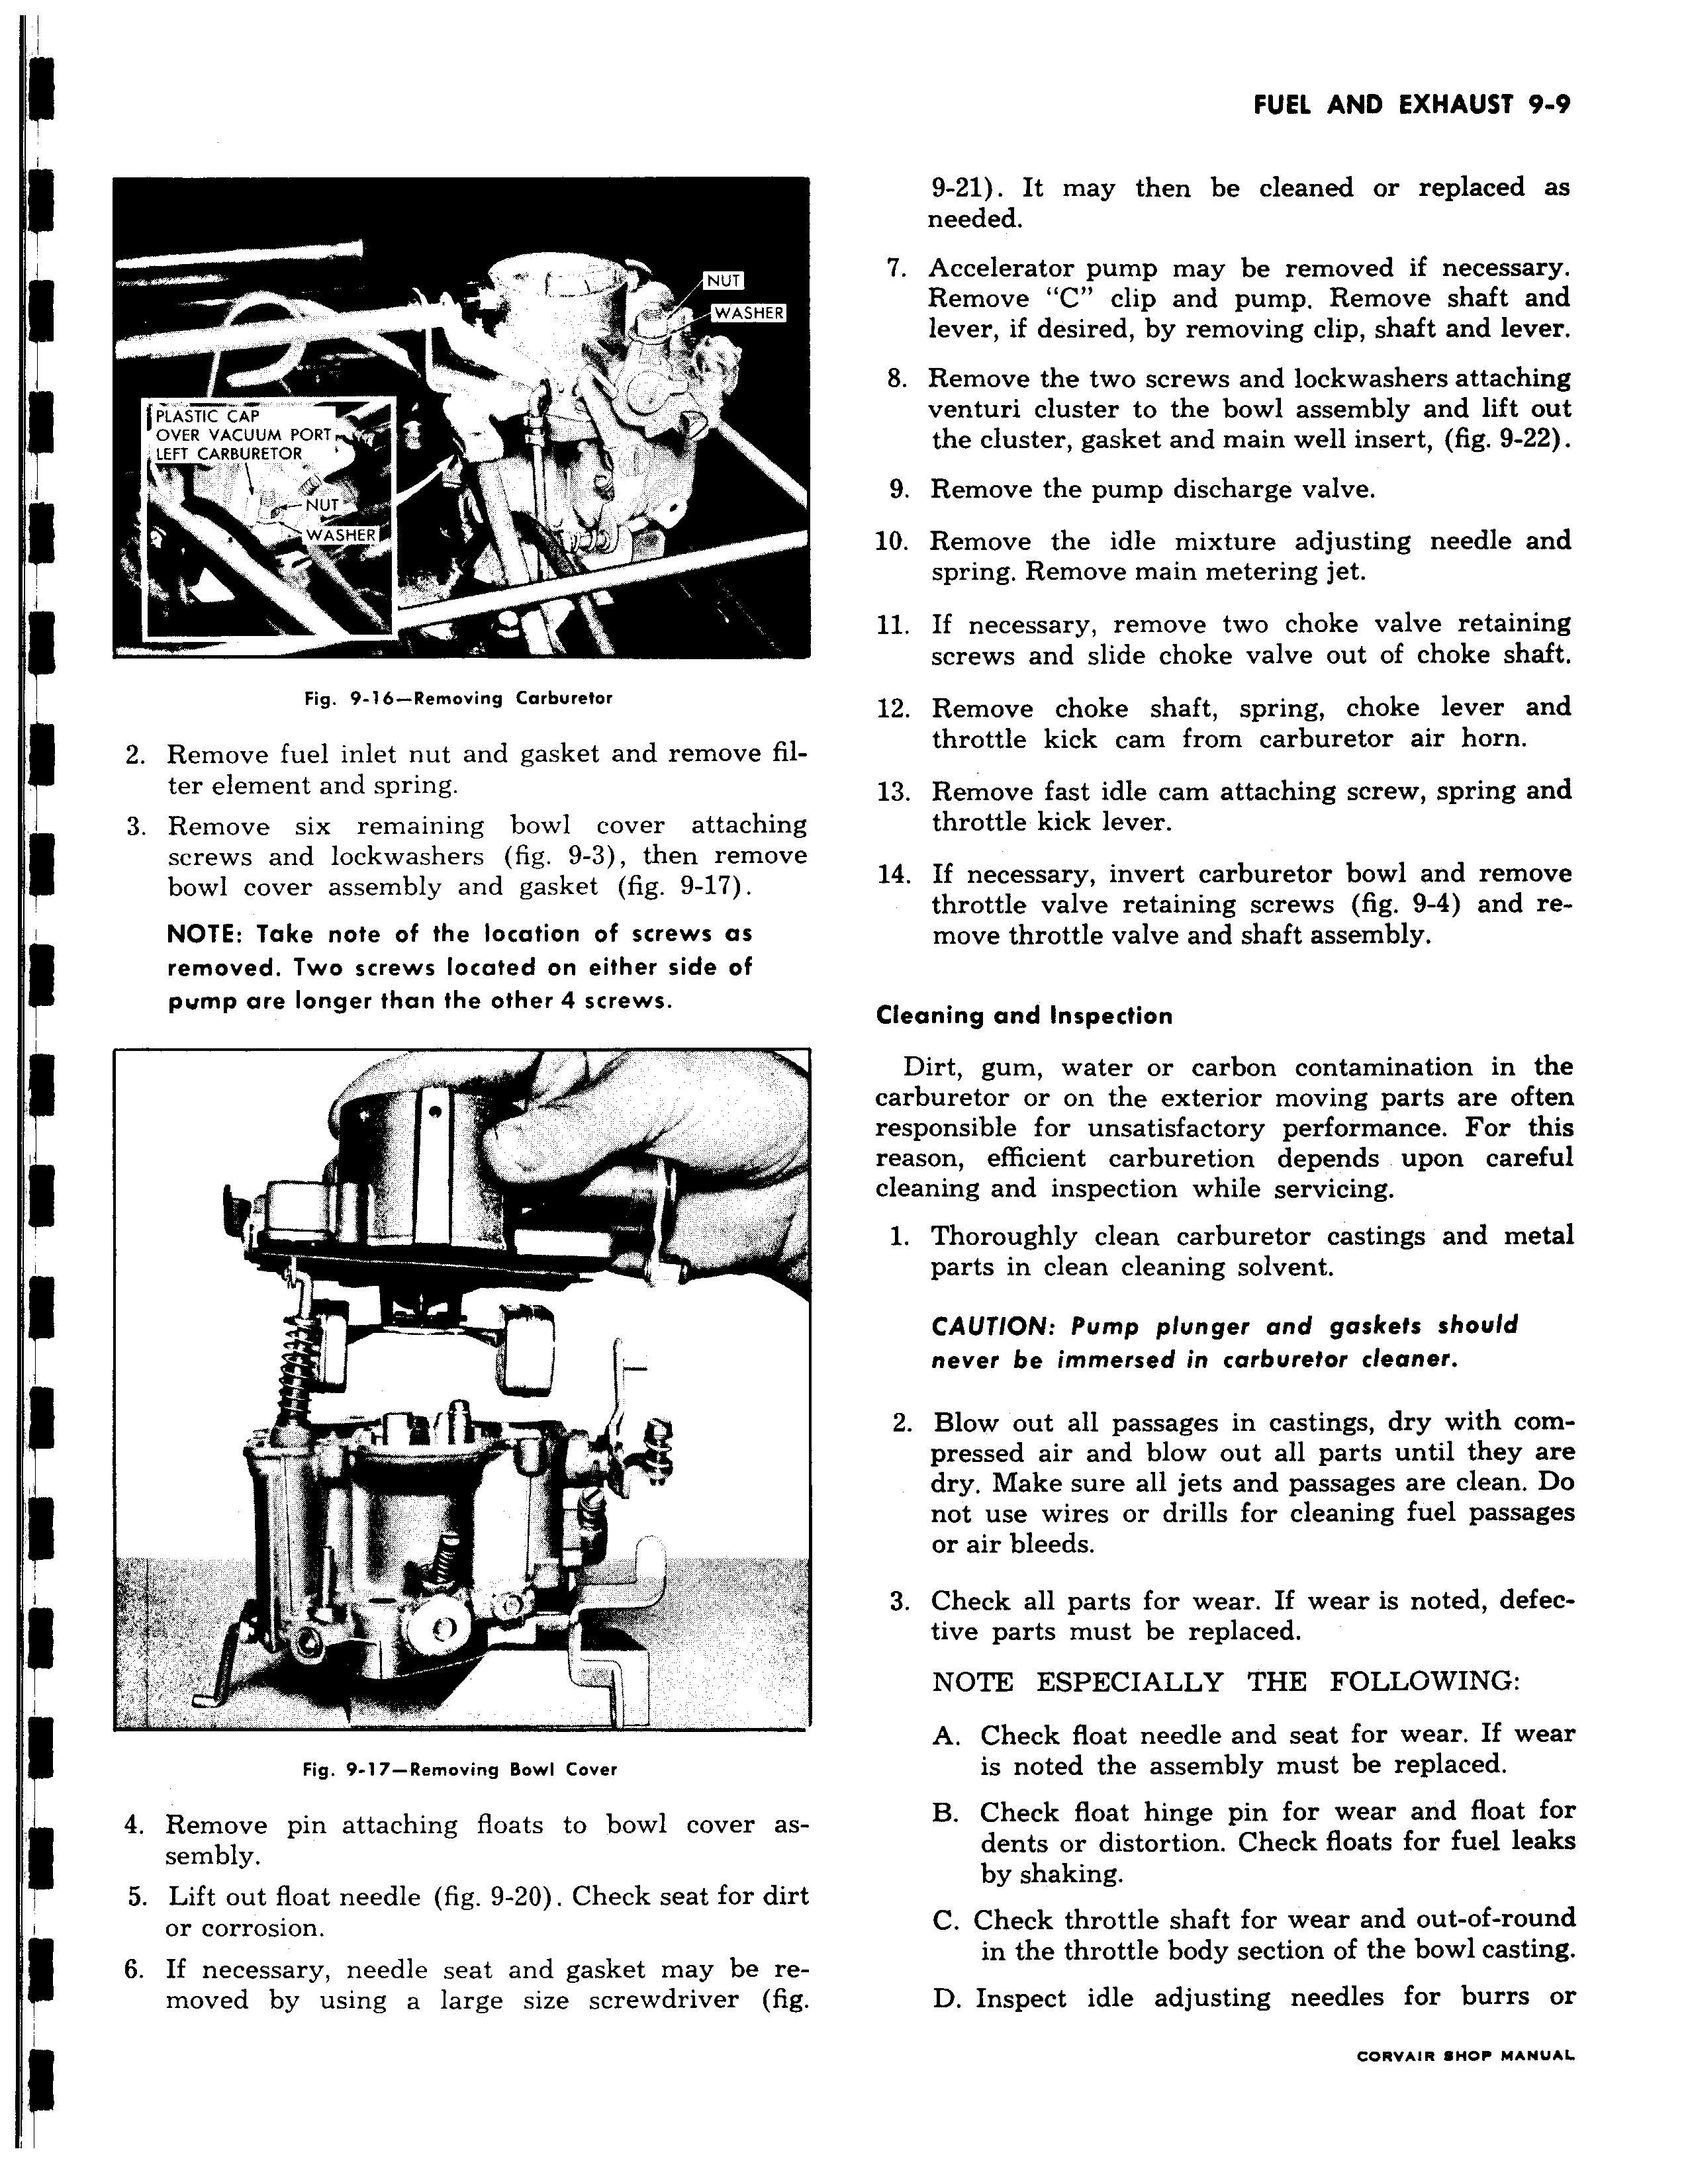
NUT 111 WASHER PLASTIC CAP OVER VACUUM PORT LEFT CARBURETOR NUT WASHER WASHER Fig 9 16 Removing Carburetor 2 Remove fuel inlet nut and gasket and remove filter element and spring 3 Remove six remaining bowl cover attaching screws and lockwashers fig 9 3 then remove bowl cover assembly and gasket fig 9 17 NOTE Take note of the location of screws as removed Two screws located on either side of pvmp are longer than the other 4 screws w i i r K i L 41 Fig 9 17 Removing Bowl Cover 4 Remove pin attaching floats to bowl cover assembly 5 Lift out float needle fig 9 20 Check seat for dirl or corrosion I 6 If necessary needle seat and gasket may be removed by using a large size screwdriver fig 9 21 It may then be cleaned or replaced as needed 7 Accelerator pump may be removed if necessary Remove C clip and pump Remove shaft and lever if desired by removing clip shaft and lever 8 Remove the two screws and lockwashers attaching venturi cluster to the bowl assembly and lift out the cluster gasket and main well insert fig 9 22 9 Remove the pump discharge valve 10 Remove the idle mixture adjusting needle and spring Remove main metering jet 11 If necessary remove two choke valve retaining screws and slide choke valve out of choke shaft 12 Remove choke shaft spring choke lever and throttle kick cam from carburetor air horn 13 Remove fast idle cam attaching screw spring and throttle kick lever 14 If necessary invert carburetor bowl and remove throttle valve retaining screws fig 9 4 and remove throttle valve and shaft assembly Cleaning and Inspection Dirt gum water or carbon contamination in the carburetor or on the exterior moving parts are often responsible for unsatisfactory performance For this reason efficient carburetion depends upon careful cleaning and inspection while servicing 1 Thoroughly clean carburetor castings and metal parts in clean cleaning solvent CAUTION Pump plunger and gaskets should never be immersed in carburetor cleaner 2 Blow out all passages in castings dry with compressed air and blow out all parts until they are dry Make sure all jets and passages are clean Do not use wires or drills for cleaning fuel passages or air bleeds 3 Check all parts for wear If wear is noted defective parts must be replaced NOTE ESPECIALLY THE FOLLOWING A Check float needle and seat for wear If wear is noted the assembly must be replaced B Check float hinge pin for wear and float for dents or distortion Check floats for fuel leaks by shaking C Check throttle shaft for wear and out of round in the throttle body section of the bowl casting D Inspect idle adjusting needles for burrs or C fRV IR SHOP MANUAL

 Next
Next