Jeep Parts Wiki | Ford Parts Wiki
Home | Search | Browse | Marketplace | Messages | FAQ | Guest
Prev

 Next
Next
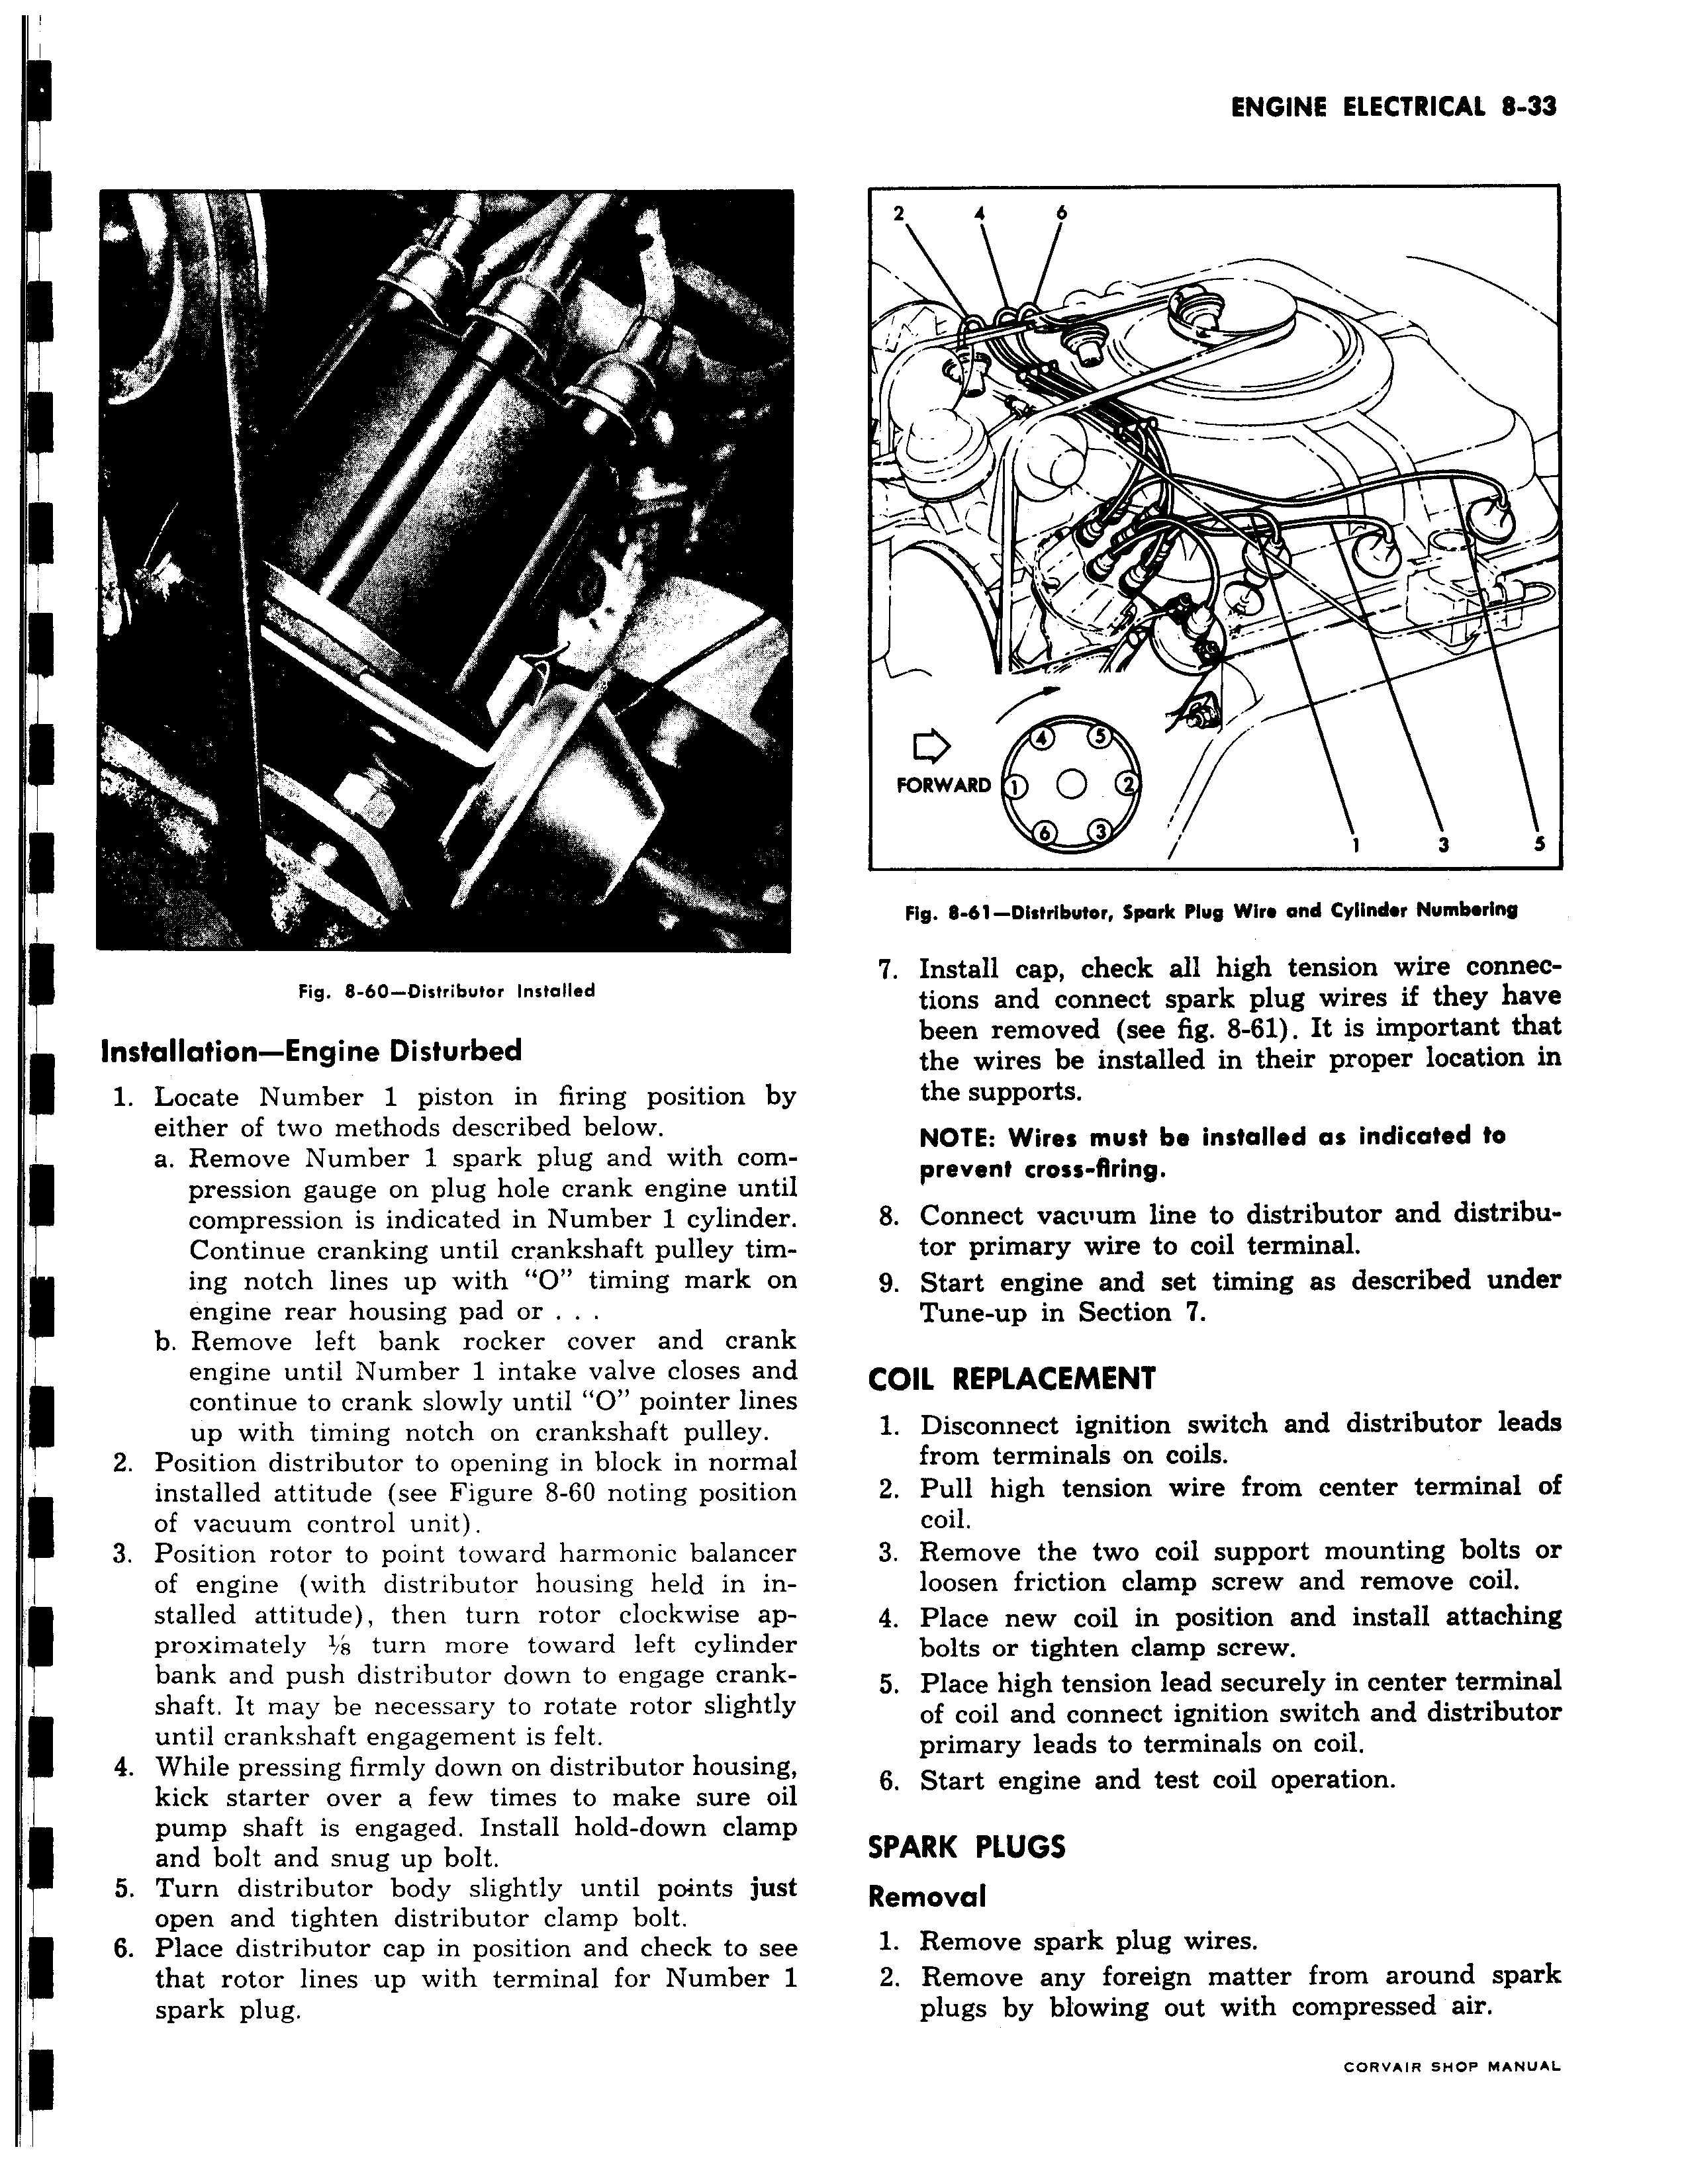
v w Fig 8 60 Oistributor Installed I Installation Engine Disturbed 1 Locate Number 1 piston in firing position by either of two methods described below a Remove Number 1 spark plug and with compression gauge on plug hole crank engine until compression is indicated in Number 1 cylinder Continue cranking until crankshaft pulley timing notch lines up with O timing mark on engine rear housing pad or b Remove left bank rocker cover and crank engine until Number 1 intake valve closes and I continue to crank slowly until O pointer lines up with timing notch on crankshaft pulley 2 Position distributor to opening in block in normal installed attitude see Figure 8 60 noting position of vacuum control unit 3 Position rotor to point toward harmonic balancer of engine with distributor housing held in installed attitude then turn rotor clockwise ap proximately 1 s turn more toward left cylinder bank and push distributor down to engage crankshaft It may be necessary to rotate rotor slightly I until crankshaft engagement is felt 4 While pressing firmly down on distributor housing kick starter over a few times to make sure oil pump shaft is engaged Install hold down clamp and bolt and snug up bolt 5 Turn distributor body slightly until points just open and tighten distributor clamp bolt 6 Place distributor cap in position and check to see that rotor lines up with terminal for Number 1 spark plug 2 4 6 v J 4 S FORWARD 0 i 6 3 1 3 S Fig 8 61 Distributor Spark Plug Wire and Cylinder Numbering 7 Install cap check all high tension wire connections and connect spark plug wires if they have been removed see fig 8 61 It is important that the wires be installed in their proper location in the supports NOTE Wires must be installed as indicated to prevent cross firing 8 Connect vacioum line to distributor and distributor primary wire to coil terminal 9 Start engine and set timing as described under Tune up in Section 7 COIL REPLACEMENT 1 Disconnect ignition switch and distributor leads from terminals on coils 2 Pull high tension wire from center terminal of coil 3 Remove the two coil support mounting bolts or loosen friction clamp screw and remove coil 4 Place new coil in position and install attaching bolts or tighten clamp screw 5 Place high tension lead securely in center terminal of coil and connect ignition switch and distributor primary leads to terminals on coil 6 Start engine and test coil operation SPARK PLUGS Removal 1 Remove spark plug wires 2 Remove any foreign matter from around spark plugs by blowing out with compressed air

 Next
Next