Jeep Parts Wiki | Ford Parts Wiki
Home | Search | Browse | Marketplace | Messages | FAQ | Guest
Prev

 Next
Next
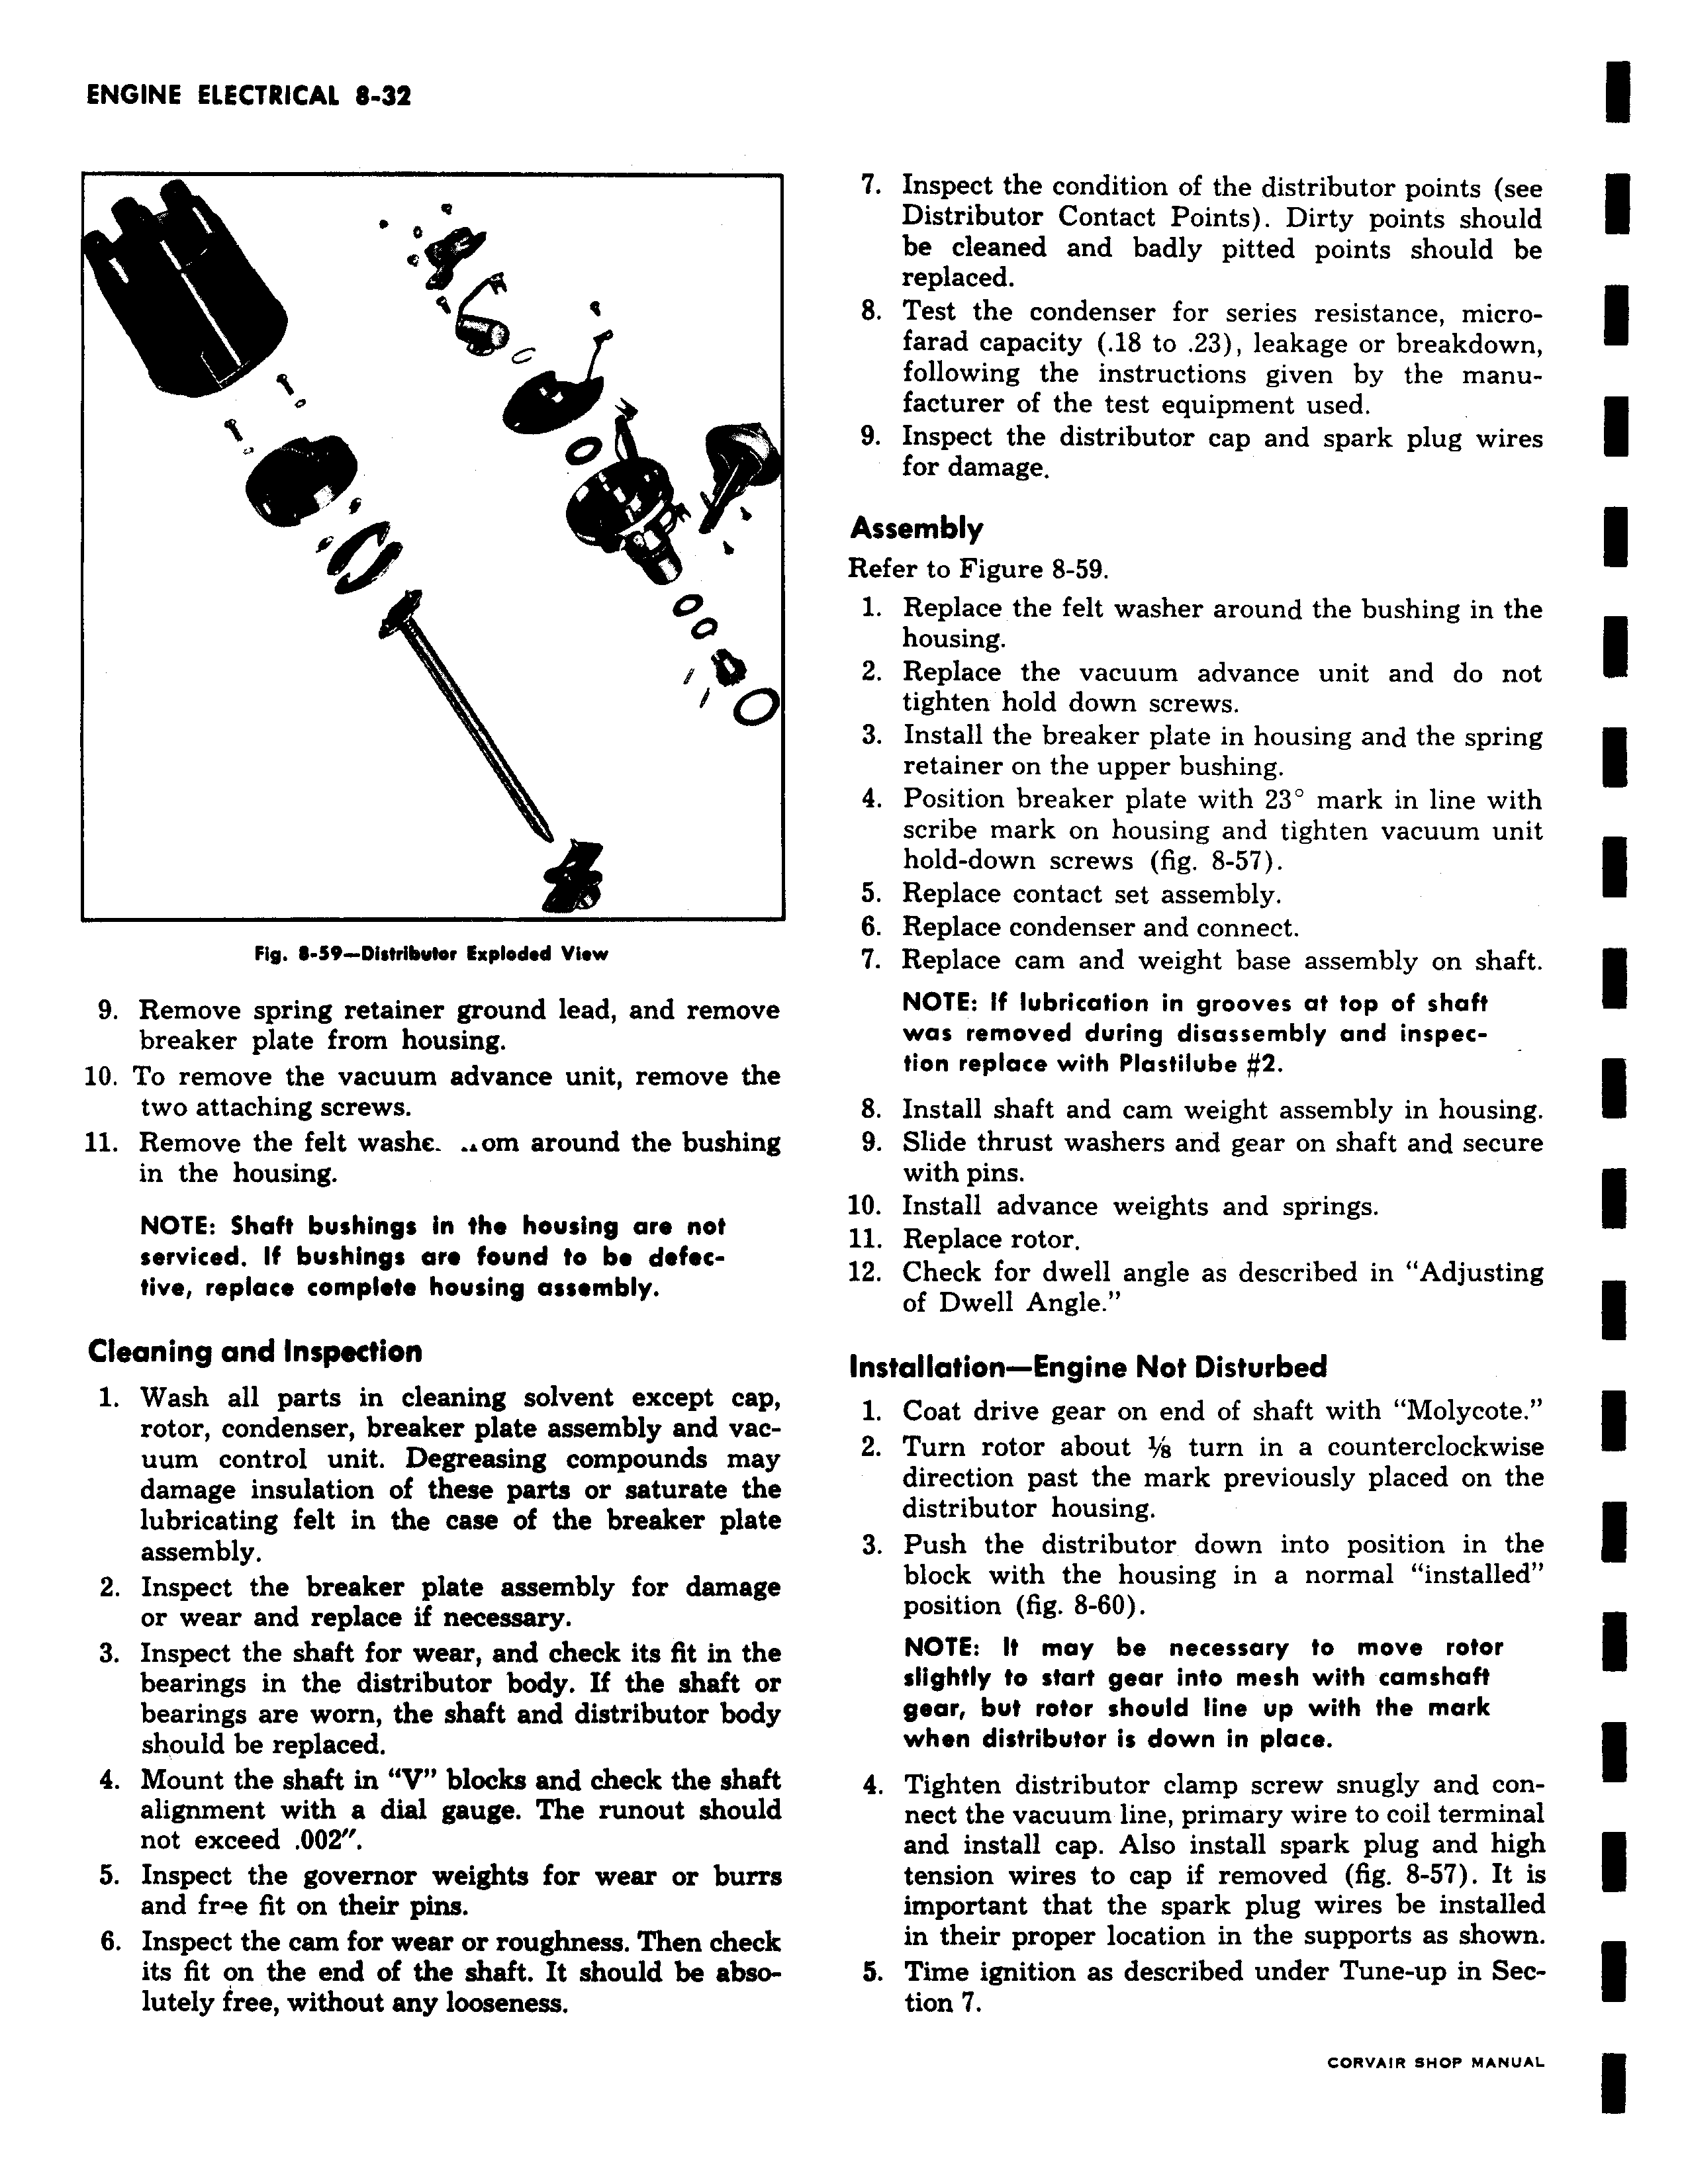
a c 4 t G O O s Y O p 0 Fig 59 Dittribvror Exploded View 9 Remove spring retainer ground lead and remove breaker plate from housing 10 To remove the vacuum advance unit remove the two attaching screws 11 Remove the felt washe om around the bushing in the housing NOTE Shaft bushings in the housing are not serviced If bushings are found to be defective replace complete housing assembly Cleaning and Inspection 1 Wash all parts in cleaning solvent except cap rotor condenser breaker plate assembly and vacuum control unit Degreasing compounds may damage insulation of these parts or saturate the lubricating felt in the case of the breaker plate assembly 2 Inspect the breaker plate assembly for damage or wear and replace if necessary 3 Inspect the shaft for wear and check its fit in the bearings in the distributor body If the shaft or bearings are worn the shaft and distributor body should be replaced 4 Mount the shaft in V blocks and check the shaft alignment with a dial gauge The runout should not exceed 002 5 Inspect the governor weights for wear or burrs and fr e fit on their pins 6 Inspect the cam for wear or roughness Then check its fit on the end of the shaft It should be absolutely free without any looseness 7 Inspect the condition of the distributor points see Distributor Contact Points Dirty points should be cleaned and badly pitted points should be replaced 8 Test the condenser for series resistance microfarad capacity 18 to 23 leakage or breakdown following the instructions given by the manufacturer of the test equipment used 9 Inspect the distributor cap and spark plug wires for damage Assembly Refer to Figure 8 59 1 Replace the felt washer around the bushing in the housing 2 Replace the vacuum advance unit and do not tighten hold down screws 3 Install the breaker plate in housing and the spring retainer on the upper bushing 4 Position breaker plate with 23 mark in line with scribe mark on housing and tighten vacuum unit hold down screws fig 8 57 5 Replace contact set assembly 6 Replace condenser and connect 7 Replace cam and weight base assembly on shaft NOTE If lubrication in grooves at top of shaft was removed during disassembly and inspec tion replace with Plastilube 2 8 Install shaft and cam weight assembly in housing 9 Slide thrust washers and gear on shaft and secure with pins 10 Install advance weights and springs 11 Replace rotor 12 Check for dwell angle as described in Adjusting of Dwell Angle Installation Engine Not Disturbed 1 Coat drive gear on end of shaft with Molycote 2 Turn rotor about turn in a counterclockwise direction past the mark previously placed on the distributor housing 3 Push the distributor down into position in the block with the housing in a normal installed position fig 8 60 NOTE It may be necessary to move rotor slightly to start gear into mesh with camshaft gear but rotor should line up with the mark when distributor is down in place 4 Tighten distributor clamp screw snugly and connect the vacuum line primary wire to coil terminal and install cap Also install spark plug and high tension wires to cap if removed fig 8 57 It is important that the spark plug wires be installed in their proper location in the supports as shown 5 Time ignition as described under Tune up in Section 7

 Next
Next