Jeep Parts Wiki | Ford Parts Wiki
Home | Search | Browse
Prev

 Next
Next
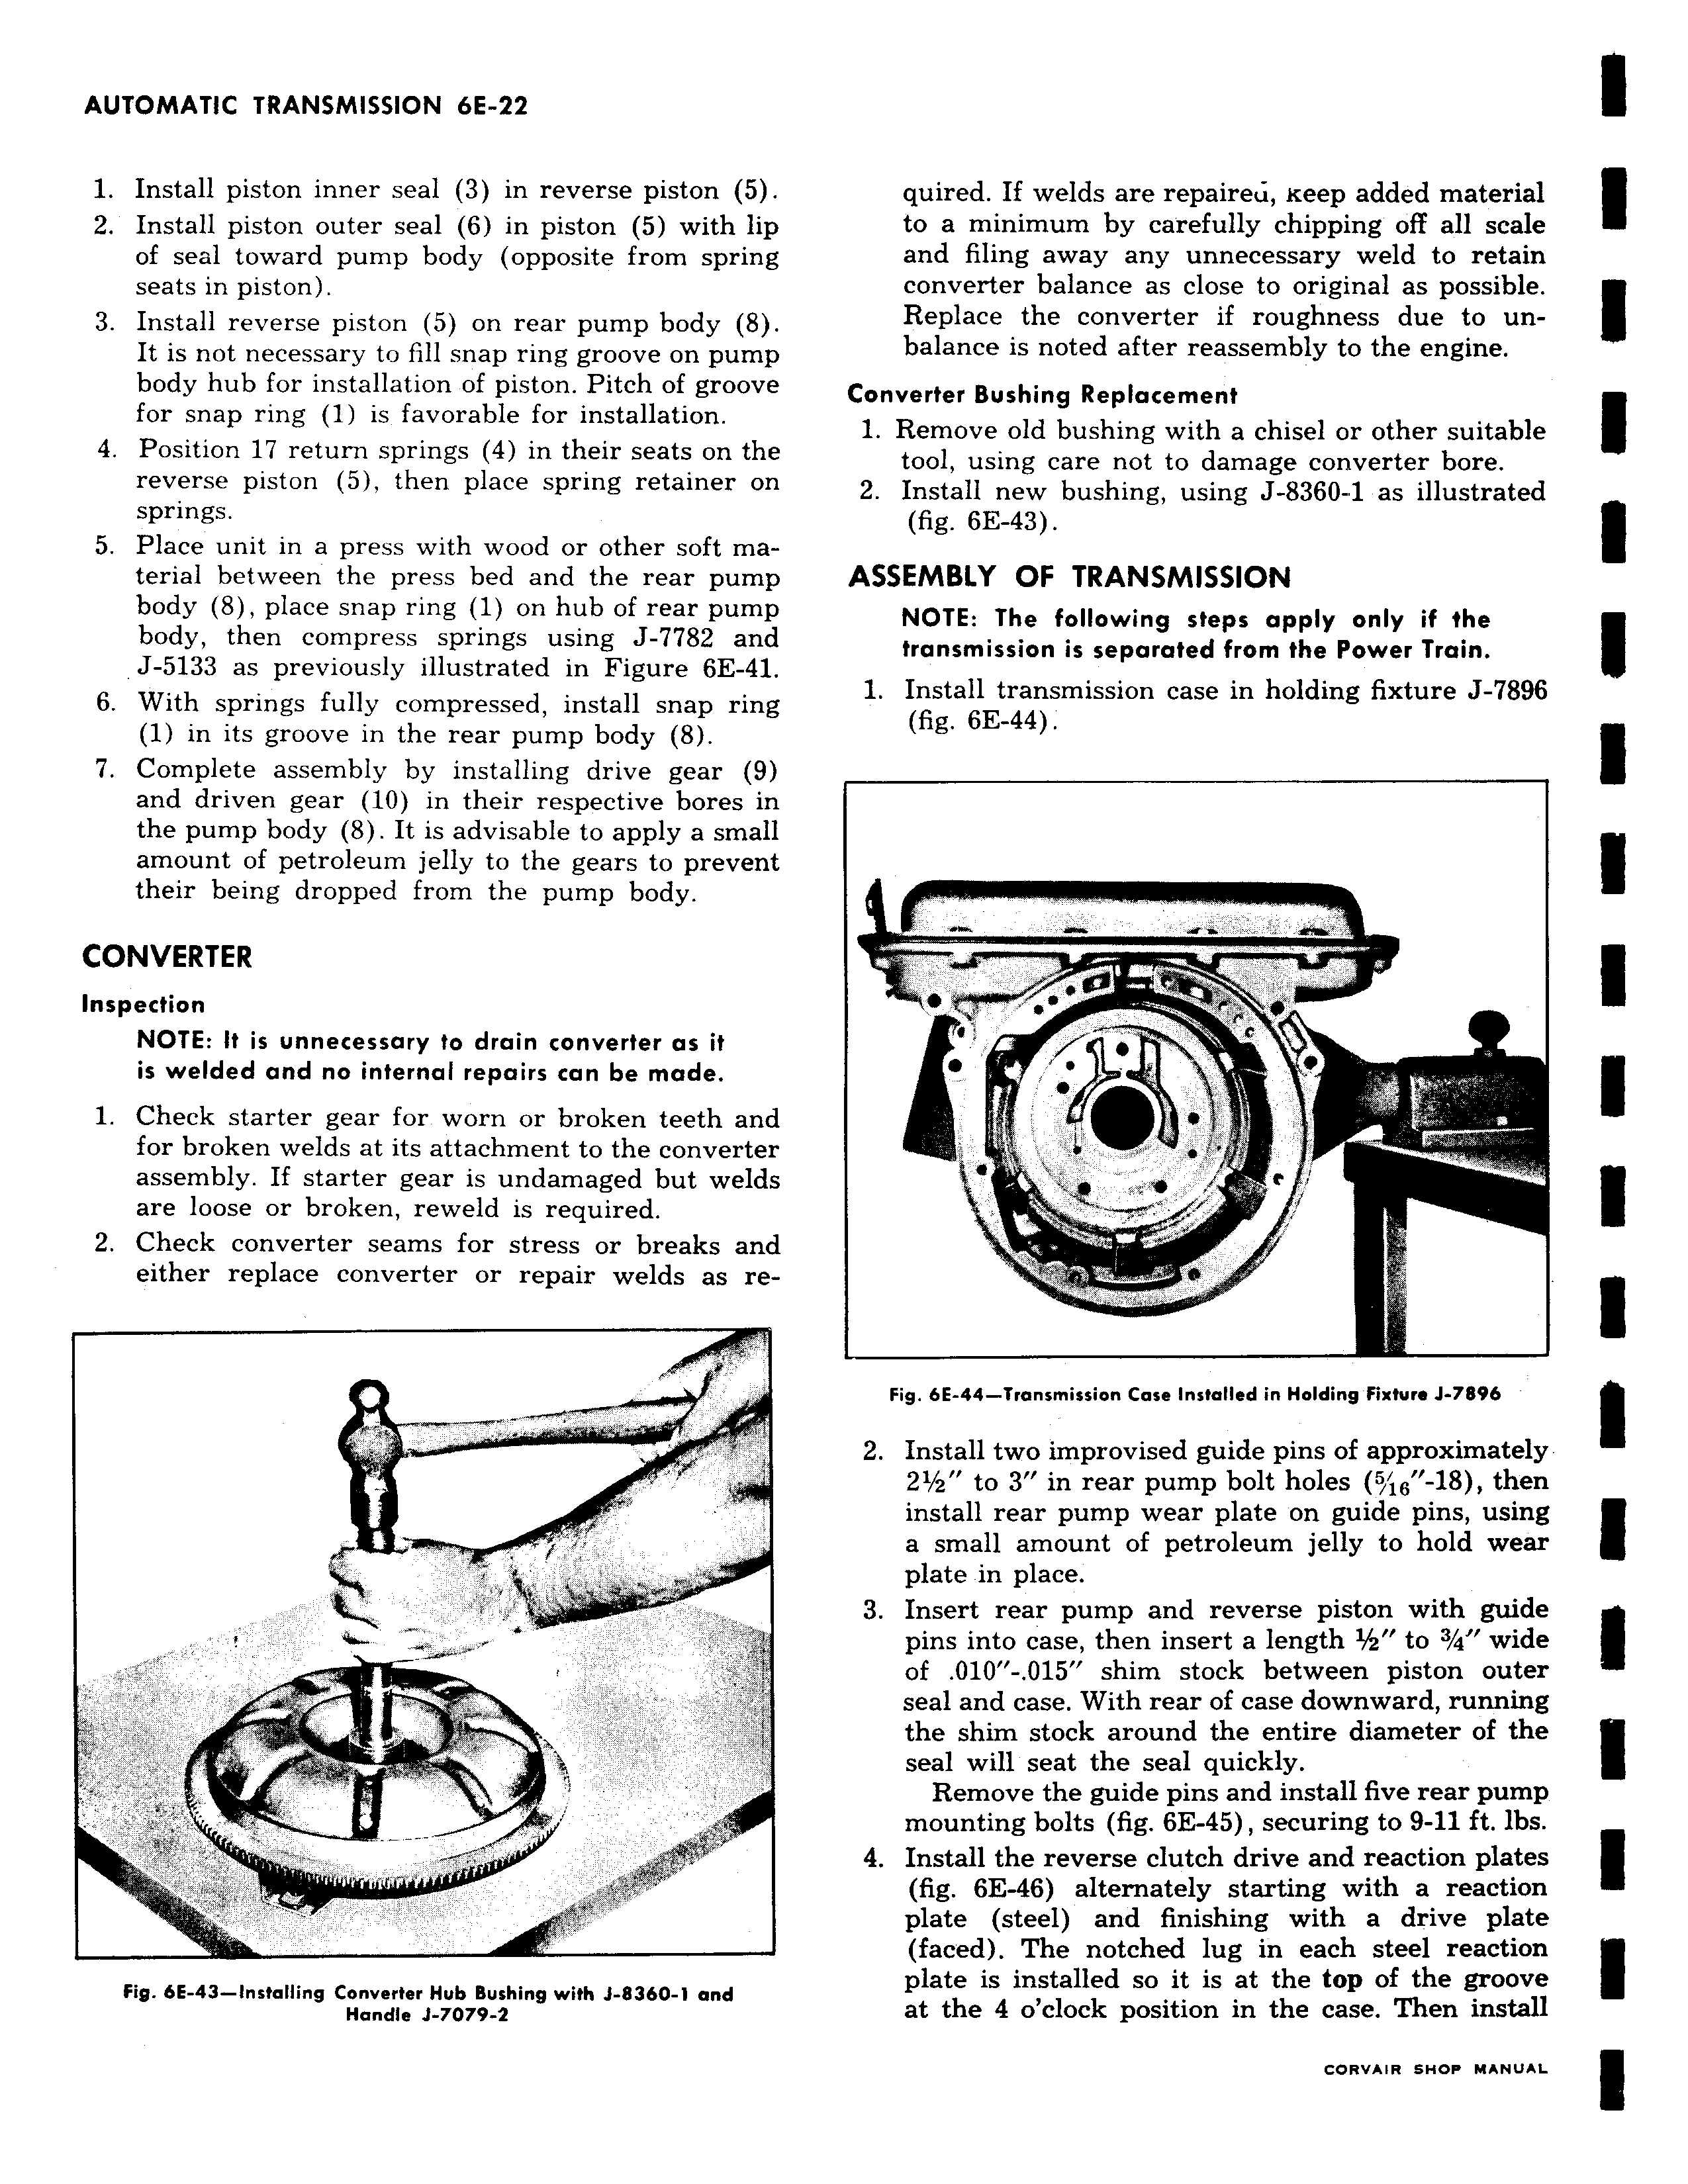
1 Install piston inner seal 3 in reverse piston 5 2 Install piston outer seal 6 in piston 5 with lip of seal toward pump body opposite from spring seats in piston 3 Install reverse piston 5 on rear pump body 8 It is not necessary to fill snap ring groove on pump body hub for installation of piston Pitch of groove for snap ring 1 is favorable for installation 4 Position 17 return springs 4 in their seats on the reverse piston 5 then place spring retainer on springs 5 Place unit in a press with wood or other soft material between the press bed and the rear pump body 8 place snap ring 1 on hub of rear pump body then compress springs using J 7782 and J 5133 as previously illustrated in Figure 6E 41 6 With springs fully compressed install snap ring 1 in its groove in the rear pump body 8 7 Complete assembly by installing drive gear 9 and driven gear 10 in their respective bores in the pump body 8 It is advisable to apply a small amount of petroleum jelly to the gears to prevent their being dropped from the pump body CONVERTER Inspection NOTE It is unnecessary to drain converter as it is welded and no internal repairs can be made 1 Check starter gear for worn or broken teeth and for broken welds at its attachment to the converter assembly If starter gear is undamaged but welds are loose or broken reweld is required 2 Check converter seams for stress or breaks and either replace converter or repair welds as re kv IV 4 p q A Fig 6E 43 Installing Converter Hub Bushing with J 8360 1 and Handle J 7079 2 quired If welds are repaireu xeep added material to a minimum by carefully chipping off all scale and filing away any unnecessary weld to retain converter balance as close to original as possible Replace the converter if roughness due to unbalance is noted after reassembly to the engine Converter Bushing Replacement 1 Remove old bushing with a chisel or other suitable tool using care not to damage converter bore 2 Install new bushing using J 8360 1 as illustrated fig 6E 43 ASSEMBLY OF TRANSMISSION NOTE The following steps apply only if the transmission is separated from the Power Train 1 Install transmission case in holding fixture J 7896 fig 6E 44 O W MAP T kJ Fig 6E 44 Transmission Case Installed in Holding Fixture J 7896 2 Install two improvised guide pins of approximately 21 2 to 3 in rear pump bolt holes 51 16 18 then install rear pump wear plate on guide pins using a small amount of petroleum jelly to hold wear plate in place 3 Insert rear pump and reverse piston with guide pins into case then insert a length to 3 4 wide of 010 015 shim stock between piston outer seal and case With rear of case downward running the shim stock around the entire diameter of the seal will seat the seal quickly Remove the guide pins and install five rear pump mounting bolts fig 6E 45 securing to 9 11 ft lbs 4 Install the reverse clutch drive and reaction plates fig 6E 46 alternately starting with a reaction plate steel and finishing with a drive plate faced The notched lug in each steel reaction plate is installed so it is at the top of the groove at the 4 o clock position in the case Then install

 Next
Next