Jeep Parts Wiki | Ford Parts Wiki
Home | Search | Browse
Prev

 Next
Next
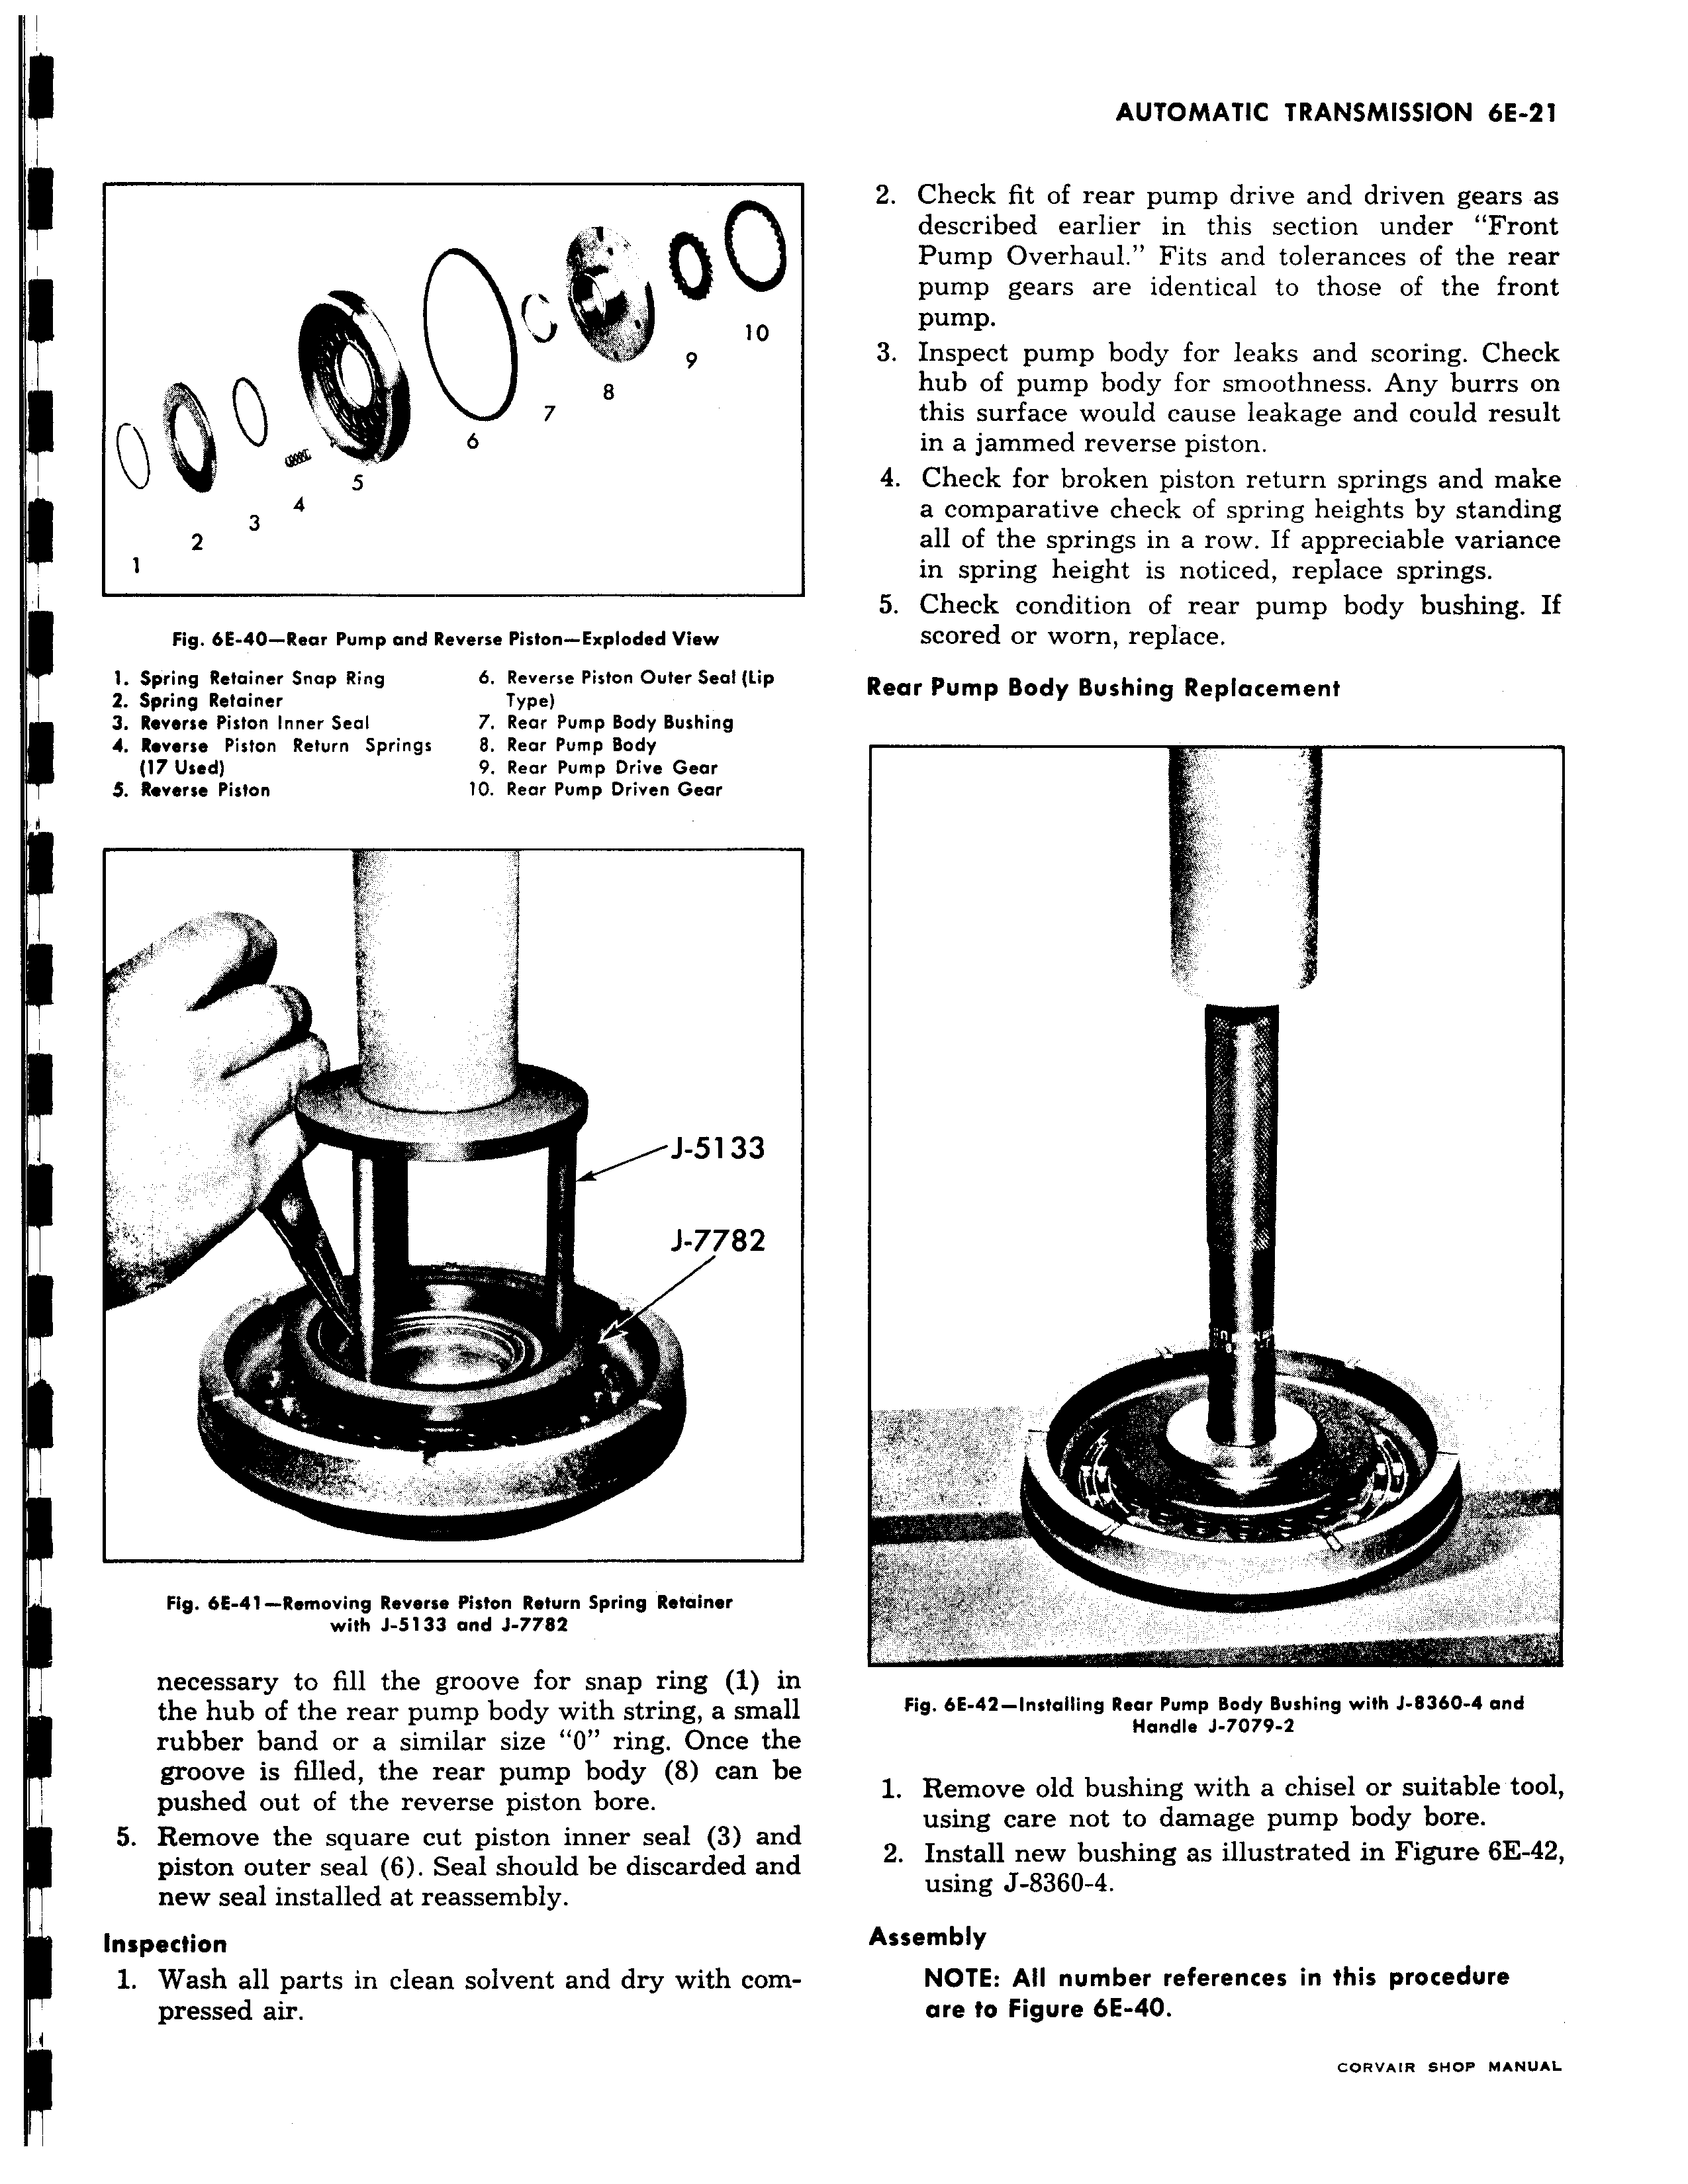
i 10 9 8 1 6 7 4 3 2 Fig 6E 40 Rear Pump and Reverse Piston Exploded View 1 Spring Retainer Snap Ring 6 Reverse Piston Outer Seal Lip 2 Spring Retainer Type 3 Reverse Piston Inner Seal 7 Rear Pump Body Bushing 4 Reverse Piston Return Springs 8 Rear Pump Body 17 Used 9 Rear Pump Drive Gear S Reverse Piston 10 Rear Pump Driven Gear y i 1 i 1 J 5133 J 7782 3 k Fig 6E 41 Removing Reverse Piston Return Spring Retainer with J 5133 and J 7782 necessary to fill the groove for snap ring i in the hub of the rear pump body with string a small rubber band or a similar size 0 ring Once the groove is filled the rear pump body 8 can be pushed out of the reverse piston bore 5 Remove the square cut piston inner seal 3 and piston outer seal 6 Seal should be discarded and new seal installed at reassembly Inspection 1 Wash all parts in clean solvent and dry with compressed air 2 Check fit of rear pump drive and driven gears as described earlier in this section under Front Pump Overhaul Fits and tolerances of the rear pump gears are identical to those of the front pump 3 Inspect pump body for leaks and scoring Check hub of pump body for smoothness Any burrs on this surface would cause leakage and could result in a jammed reverse piston 4 Check for broken piston return springs and make a comparative check of spring heights by standing all of the springs in a row If appreciable variance in spring height is noticed replace springs 5 Check condition of rear pump body bushing If scored or worn replace Rear Pump Body Bushing Replacement A Fig 6E 42 Installing Rear Pump Body Bushing with J 8360 4 and Handle J 7079 2 1 Remove old bushing with a chisel or suitable tool using care not to damage pump body bore 2 Install new bushing as illustrated in Figure 6E 42 using J 8360 4 Assembly NOTE All number references in this procedure are to Figure 6E 40

 Next
Next