Jeep Parts Wiki | Ford Parts Wiki
Home | Search | Browse | Marketplace | Messages | FAQ | Guest
Prev

 Next
Next
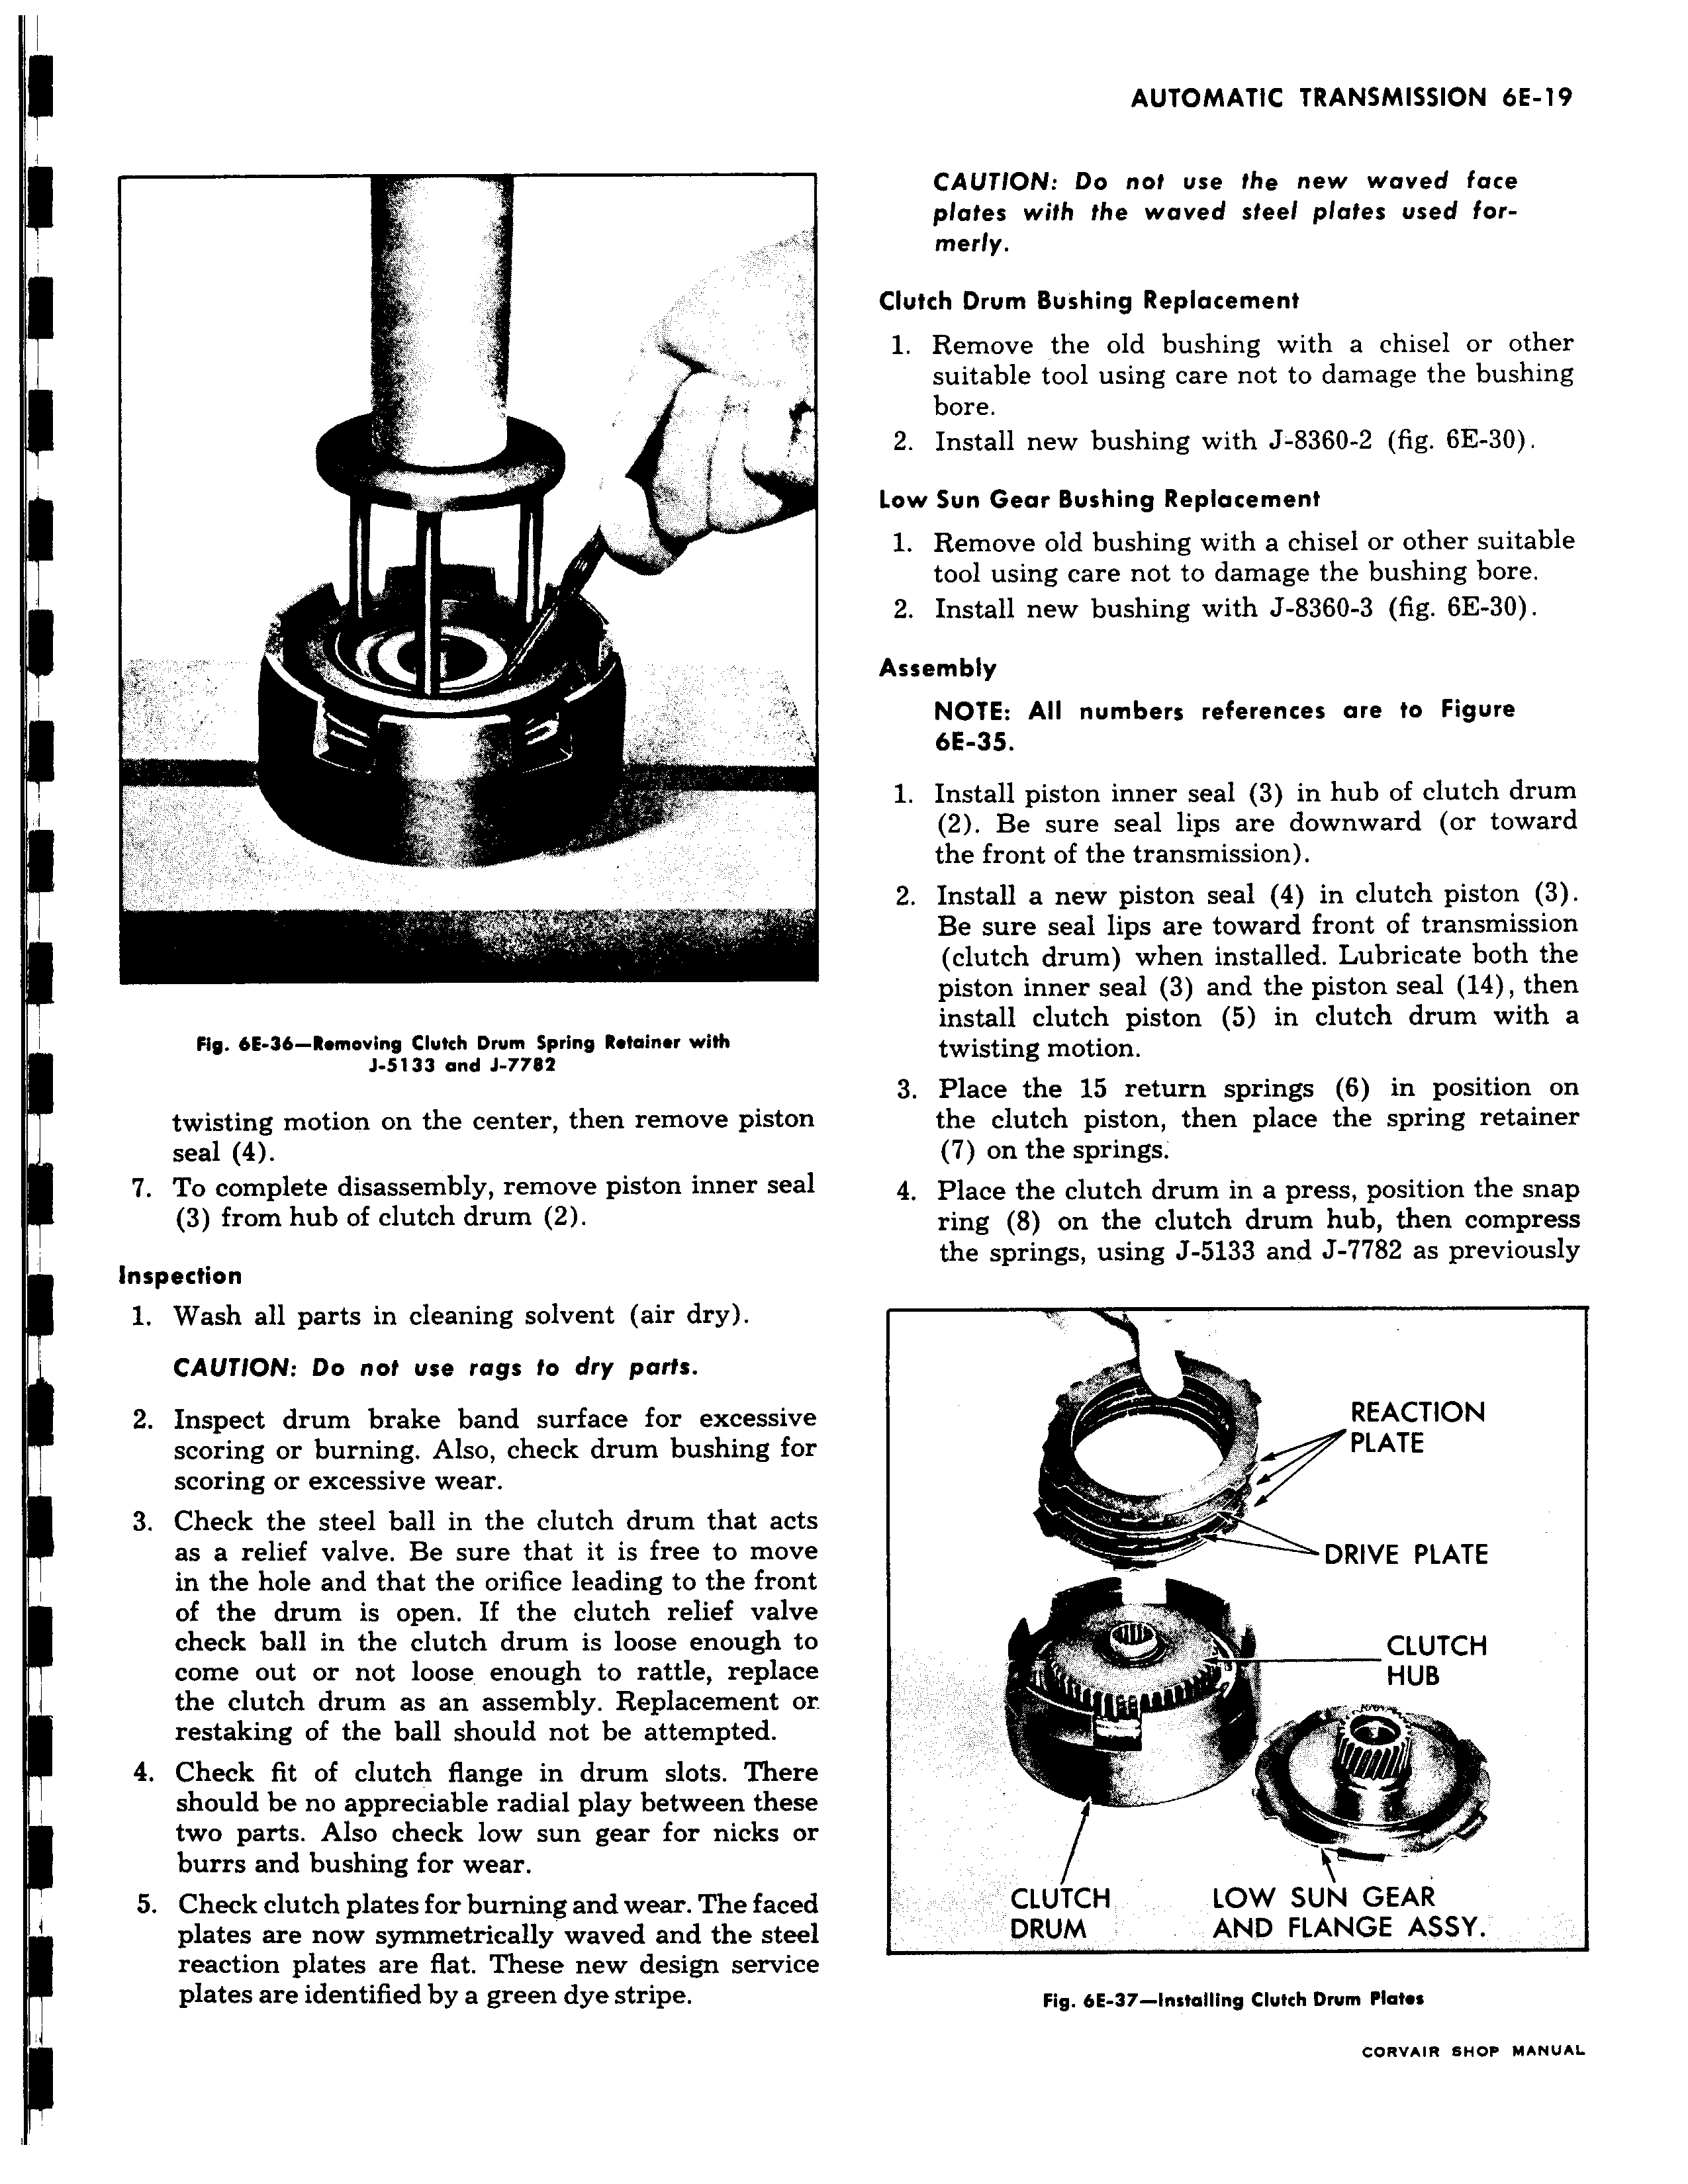
F FiR 6E 36 Romoving Clutch Drum Spring Retainer with J 5133 and J 7782 twisting motion on the center then remove pistoi seal 4 7 To complete disassembly remove piston inner sea 3 from hub of clutch drum 2 Inspection 1 Wash all parts in cleaning solvent air dry CAUTION Do not use rags to dry parts 2 Inspect drum brake band surface for excessiv scoring or burning Also check drum bushing fo scoring or excessive wear I 3 Check the steel ball in the clutch drum that act as a relief valve Be sure that it is free to mov in the hole and that the orifice leading to the fron I of the drum is open If the clutch relief valv check ball in the clutch drum is loose enough t come out or not loose enough to rattle replac the clutch drum as an assembly Replacement o restaking of the ball should not be attempted 4 Check fit of clutch flange in drum slots Ther should be no appreciable radial play between thes two parts Also check low sun gear for nicks c burrs and bushing for wear 5 Check clutch plates for burning and wear The face plates are now symmetrically waved and the steE reaction plates are flat These new design servic plates are identified by a green dye stripe 1 CAUTION Do not use the new waved face plates with the waved steel plates used formerly Clutch Drum Bushing Replacement 1 Remove the old bushing with a chisel or other suitable tool using care not to damage the bushing bore 2 Install new bushing with J 8360 2 fig 6E 30 Low Sun Gear Bushing Replacement 1 Remove old bushing with a chisel or other suitable tool using care not to damage the bushing bore 2 Install new bushing with J 8360 3 fig 6E 30 Assembly NOTE All numbers references are to Figure 6E 35 1 Install piston inner seal 3 in hub of clutch drum 2 Be sure seal lips are downward or toward the front of the transmission 2 Install a new piston seal 4 in clutch piston 3 Be sure seal lips are toward front of transmission clutch drum when installed Lubricate both the piston inner seal 3 and the piston seal 14 then install clutch piston 5 in clutch drum with a twisting motion 3 Place the 15 return springs 6 in position on i the clutch piston then place the spring retainer 7 on the springs 1 4 Place the clutch drum in a press position the snap ring 8 on the clutch drum hub then compress the springs using J 5133 and J 7782 as previously REACTION PLATE s e DRIVE PLATE t e CLUTCH HUB e r CLUTCH LOW SUN GEAR 1 DRUM AND FLANGE ASSY Fig 6E 37 Installing Clutch Drum Plates CORVAIR SHOP MANUAL

 Next
Next