Jeep Parts Wiki | Ford Parts Wiki
Home | Search | Browse
|
Body Service Manual August 1964 |
|
Prev
 Next
Next
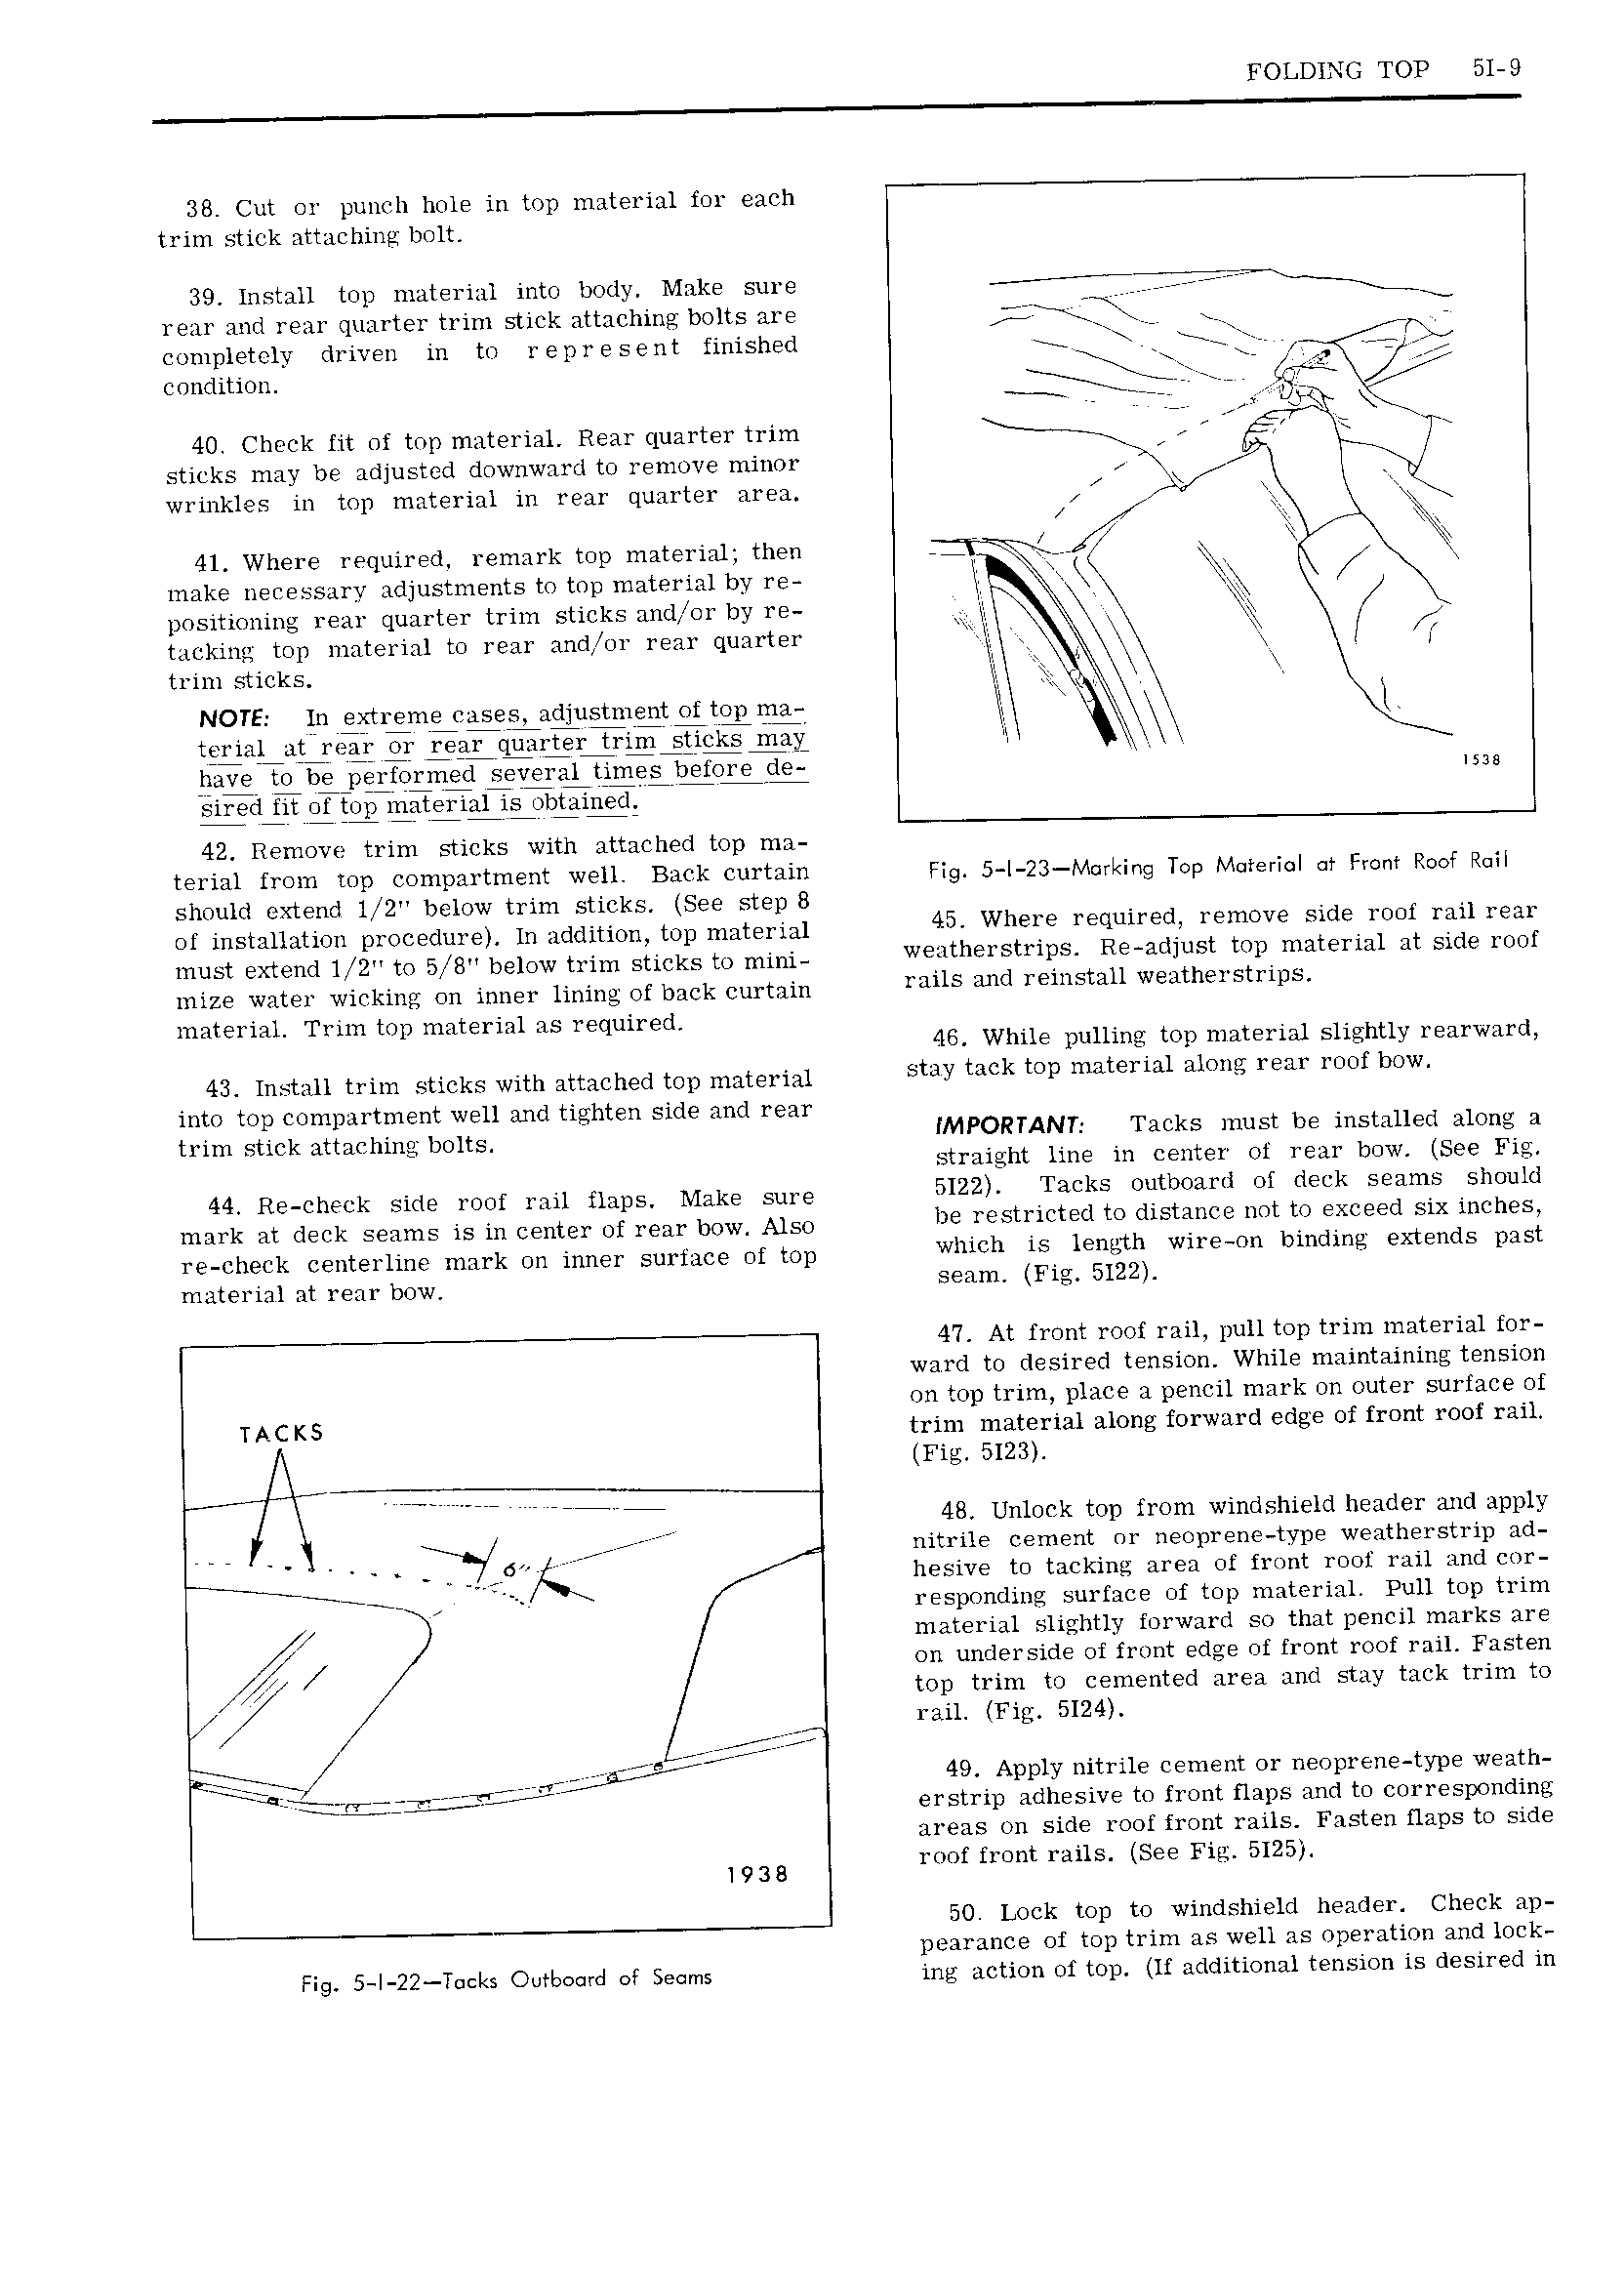
FOLDING TOP 51 9 38 Cut or punch hole in top material for each trim stick attaching bolt 39 Install top material into body Make sure rear and rear quarter trim stick attaching bolts are j f Y completely driven in to r ep re sent finished r 7 TTT g condition r QT jj er MR 40 Check fit of top material Rear quarter trim c 4 5 sticks may be adjusted downward to remove minor r rr i5 V1 wrinkles in top material in rear quarter area fl 1 41 Where required remark top material then r as make necessary adjustments to top material by re kd are t positioning rear quarter trim sticks aiicl or by re tk Q It Licking top material to rear andfor rear quarter 7 trim sticks kx tk NOTE In extreme cases adjustment of top ma ir x K tem Q 2E F 1 m hge Y1 be performed severgtimeslgoig 539 rsigi Q oftopiii eH1l5s ri V 42 Remove trim sticks with attached top ma terial from top compartment well Back curtain Fig 5 1 23 Marking Top Material or Fronr Roof Rail should extend l 2 below trim sticks See step B of installation procedure ln addition top material 45 Whew rgquirede remove Side YUM Yau Yea must extend 1 2 to 5 y8 belmv trim Sticks to mmi weatherstrips Re adjust top material at side roof mize water wicking on inner lining of back curtain mils and Tgmsmu W th St iPS material Trim top material as required 46 While pulling top material slieghtly rearward 43 Install trim sticks with attached top material SQY tack top t 1 m1 Hhmg m 1 f DOW into top compartment well and tighten side and rear trim Suck attaching bO1ts 5 fMPORTANT Tacks must be installed along a straight line in center of rear bow See 44 Re check Side mmr Yen mee Make Sure 5122 Tacks outboard of deck seams should mark at deck seams is in Center Of rem bmw Also be restricted to distance not to exceed six inches re check centerline mark on inner surface of top which is lemilh Wi O bi dl extends Past material at rear bow Hm Fig 5122 47 At front roof rail pull top trim material for ward to desired tension While maintaining tension on top trim place a pencil mark on outer surface of TACKS trim material along forward edge of front roof rail A rig 5123 7 7 rr 48 Unlock top from windshield header and apply W rrr nitrile cement or neoprene type weatherstrip ad ii hesive to tacking area of front roof rail and cor r responding surface of top material Pull top trim material slightly forward so that pencil marks are i on underside of front edge of front roof rail Fasten top trim to cemented area and stay tack trim to rail Fig 5124 ii 4 r 49 Apply nitrile cement or neoprene type weath Tl IZf3 T 5 erstrip adhesive to front flaps and to corresponding areas on side roof front rails Fasten flaps to side 1938 roof front 1 ails See 5125 50 Lock top to windshield header Check ap pearance of top trim as well as operation and lock Fig 5 I 22 T cks Outboard of Seoms ing action of top lf additional tension is desired in