Jeep Parts Wiki | Ford Parts Wiki
Home | Search | Browse | Marketplace | Messages | FAQ | Guest
Prev

 Next
Next
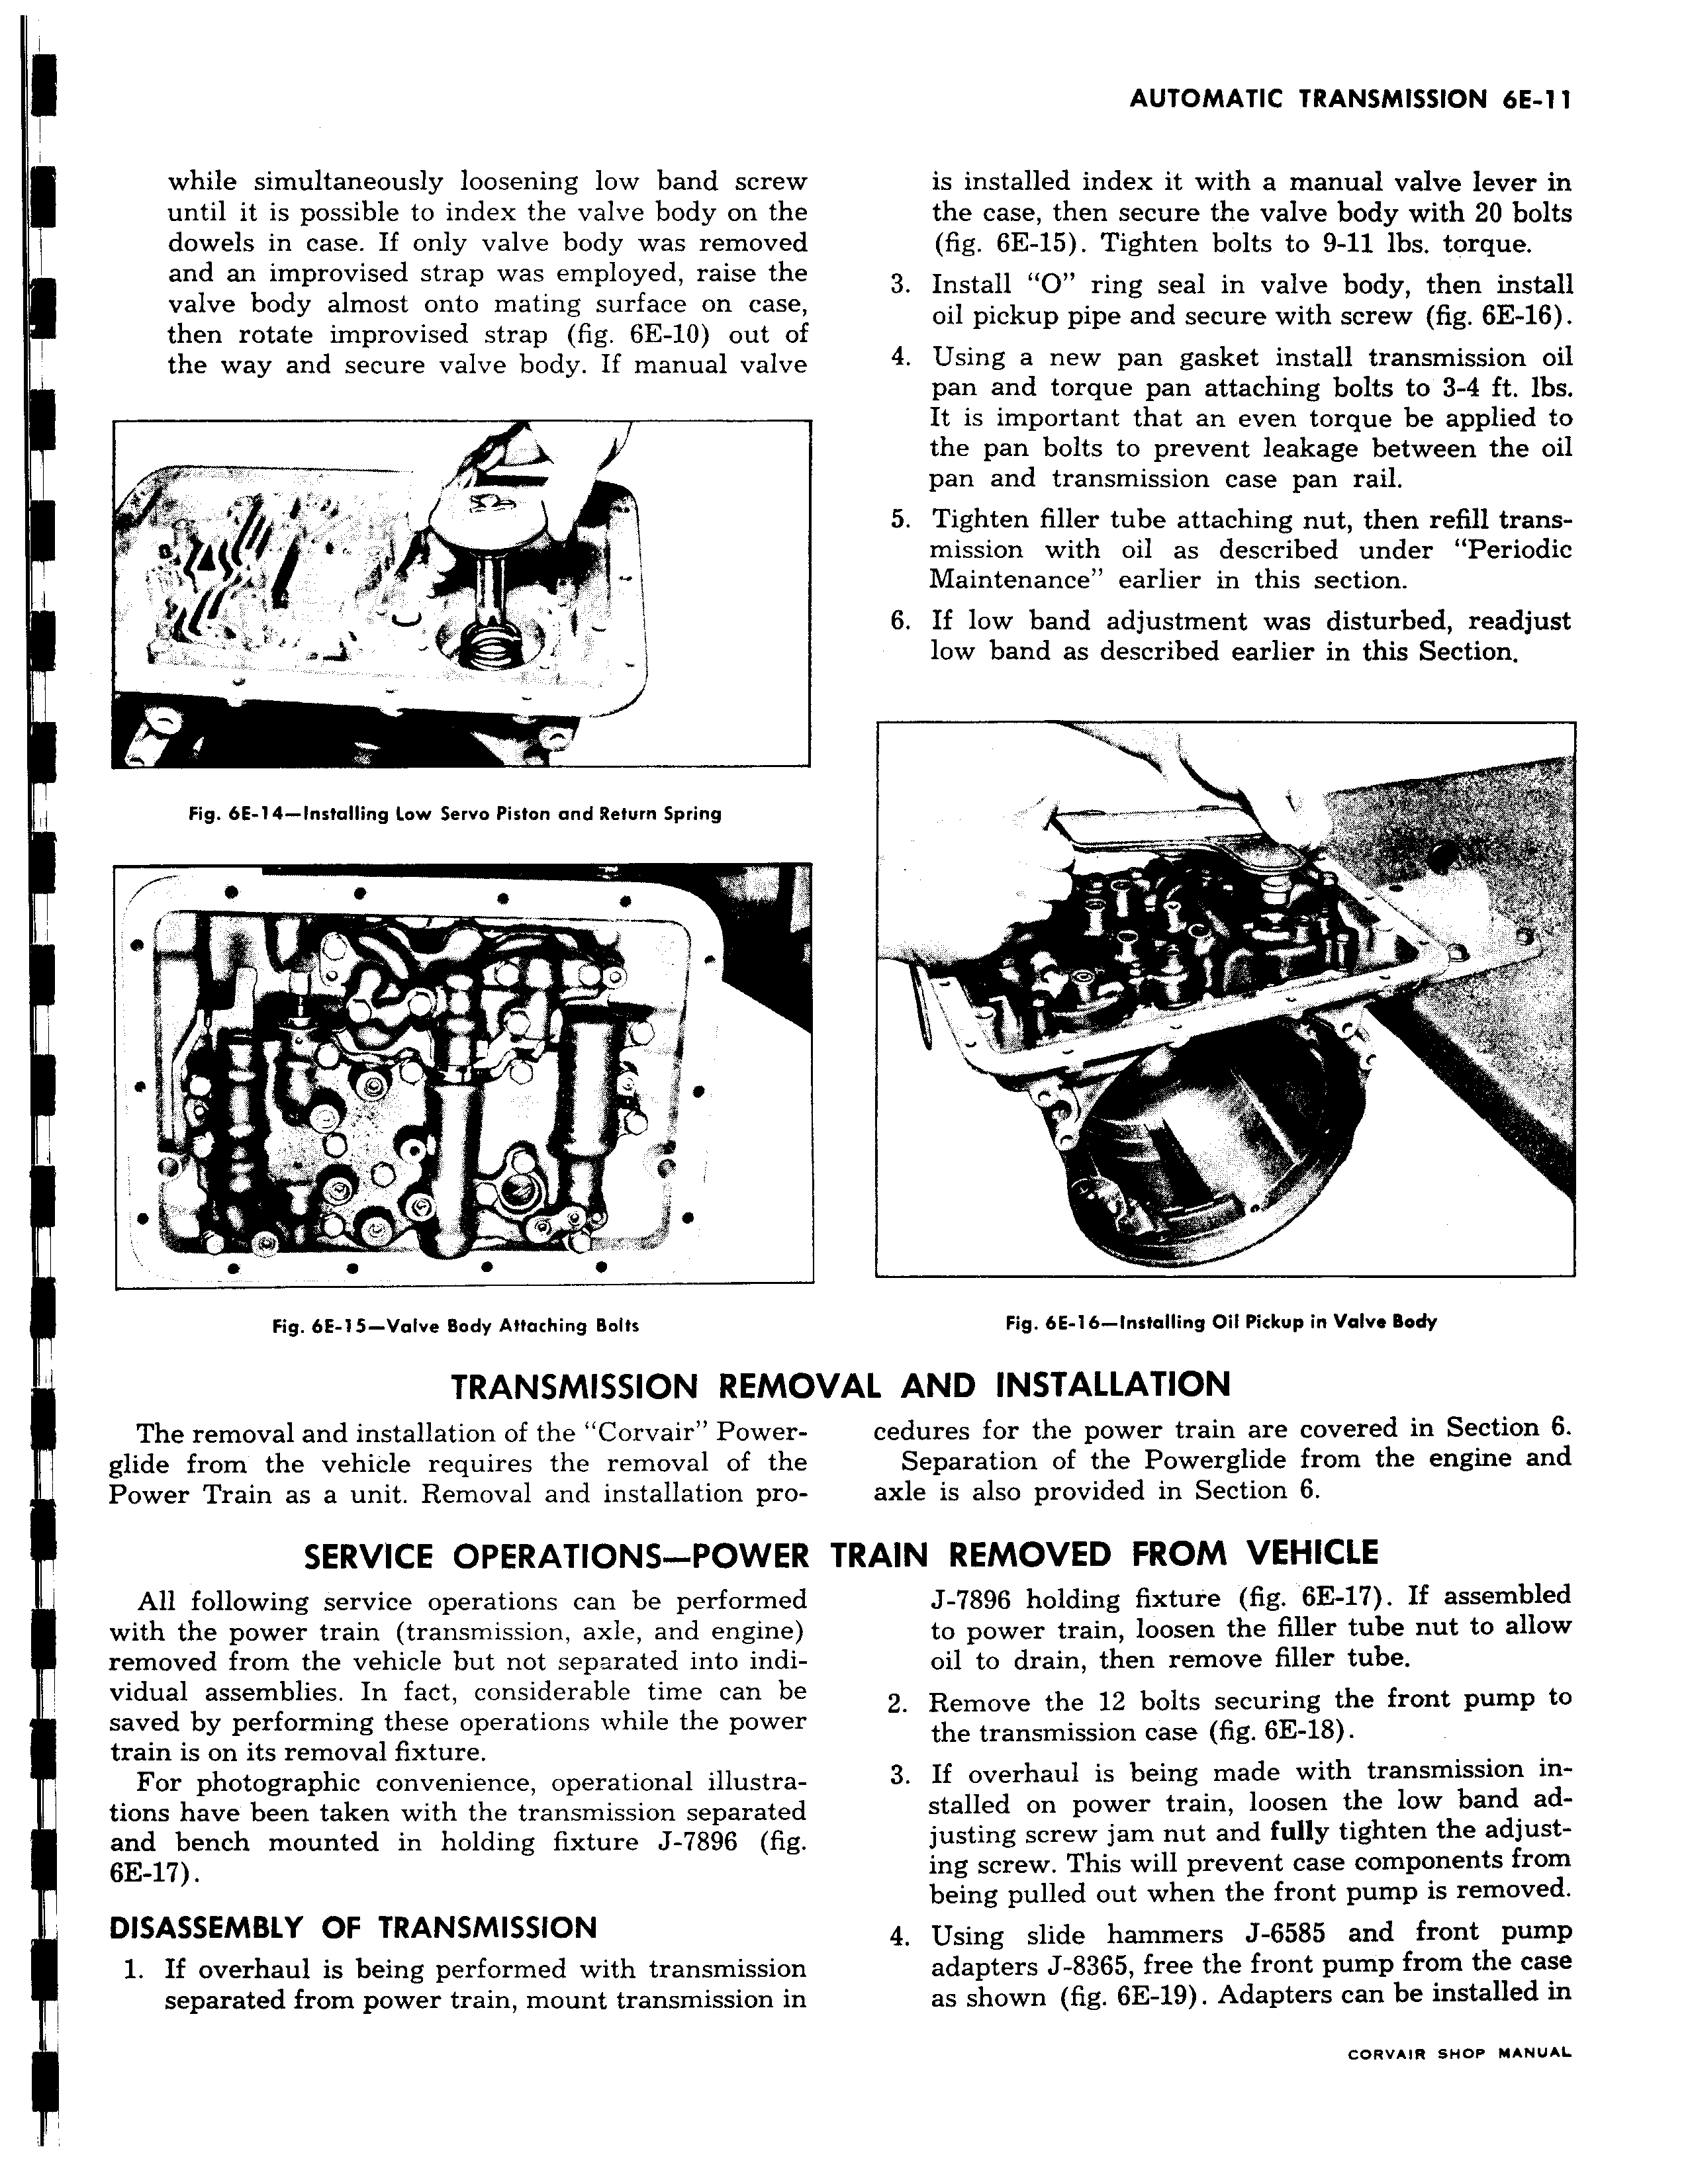
while simultaneously loosening low band screw until it is possible to index the valve body on the dowels in case If only valve body was removed and an improvised strap was employed raise the valve body almost onto mating surface on case then rotate improvised strap fig 6E 10 out o1 the way and secure valve body If manual valve f I pF i a a fr Fig 6E 14 Installing Low Servo Piston and Return Spring w t J v O y y r j MI 1q i x si w m Fig 6E 15 Valve Body Attaching Bolts TRANSMISSION REMC The removal and installation of the Corvair Powerglide from the vehicle requires the removal of the Power Train as a unit Removal and installation pro SERVICE OPERATIONS POWEA All following service operations can be performed with the power train transmission axle and engine removed from the vehicle but not separated into individual assemblies In fact considerable time can be saved by performing these operations while the power train is on its removal fixture For photographic convenience operational illustrations have been taken with the transmission separated and bench mounted in holding fixture J 7896 fig 6E 17 DISASSEMBLY OF TRANSMISSION 1 If overhaul is being performed with transmission separated from power train mount transmission in is installed index it with a manual valve lever in the case then secure the valve body with 20 bolts fig 6E 15 Tighten bolts to 9 11 lbs torque 3 Install O ring seal in valve body then install oil pickup pipe and secure with screw fig 6E 16 4 Using a new pan gasket install transmission oil pan and torque pan attaching bolts to 3 4 ft lbs It is important that an even torque be applied to the pan bolts to prevent leakage between the oil pan and transmission case pan rail 5 Tighten filler tube attaching nut then refill transmission with oil as described under Periodic Maintenance earlier in this section 6 If low band adjustment was disturbed readjust low band as described earlier in this Section h o n Fig 6E 16 Installing Oil Pickup in Valve Body VAL AND INSTALLATION cedures for the power train are covered in Section 6 Separation of the Powerglide from the engine and axle is also provided in Section 6 TRAIN REMOVED FROM VEHICLE J 7896 holding fixture fig 6E 17 If assembled to power train loosen the filler tube nut to allow oil to drain then remove filler tube 2 Remove the 12 bolts securing the front pump to the transmission case fig 6E 18 3 If overhaul is being made with transmission installed on power train loosen the low band adjusting screw jam nut and fully tighten the adjusting screw This will prevent case components from being pulled out when the front pump is removed 4 Using slide hammers J 6585 and front pump adapters J 8365 free the front pump from the case as shown fig 6E 19 Adapters can be installed in CORVAIR SHOP MANUAL

 Next
Next